What Is a Raft in 3D Printing (and Why You Rarely Need One)
A raft is the thick mat of plastic a slicer can print under your part before the part starts. Here is what it does, how it differs from a brim, when it still helps, and why none of our 540 project files use one.
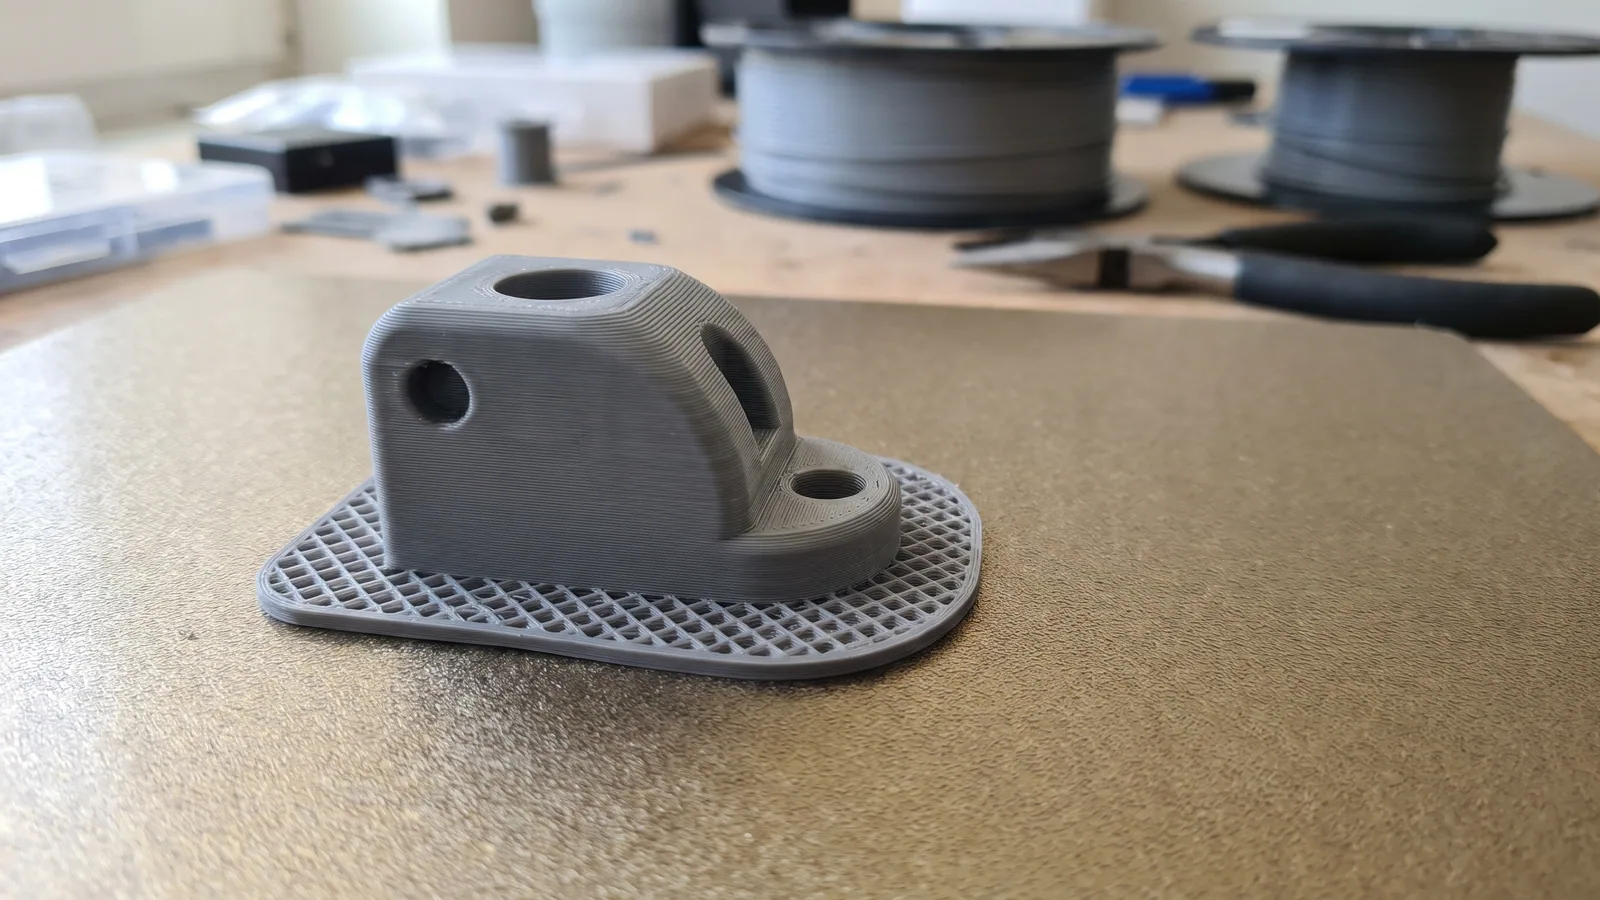
Open the support settings in any slicer and you will find a setting called raft. Turn it on and your part no longer sits on the build plate: it sits on a thick, throwaway mat of plastic that the printer lays down first. For years that mat was standard advice. On most printers sold today, it is the setting you leave at zero.
This guide explains what a raft is, how it differs from a brim and a skirt, the few cases where it still earns its place, and how to add one in Bambu Studio if you do need it. The numbers come from our own work: we checked the saved settings in 540 project files behind our ready-to-print designs, and not one of them uses a raft.
What is a raft in 3D printing?
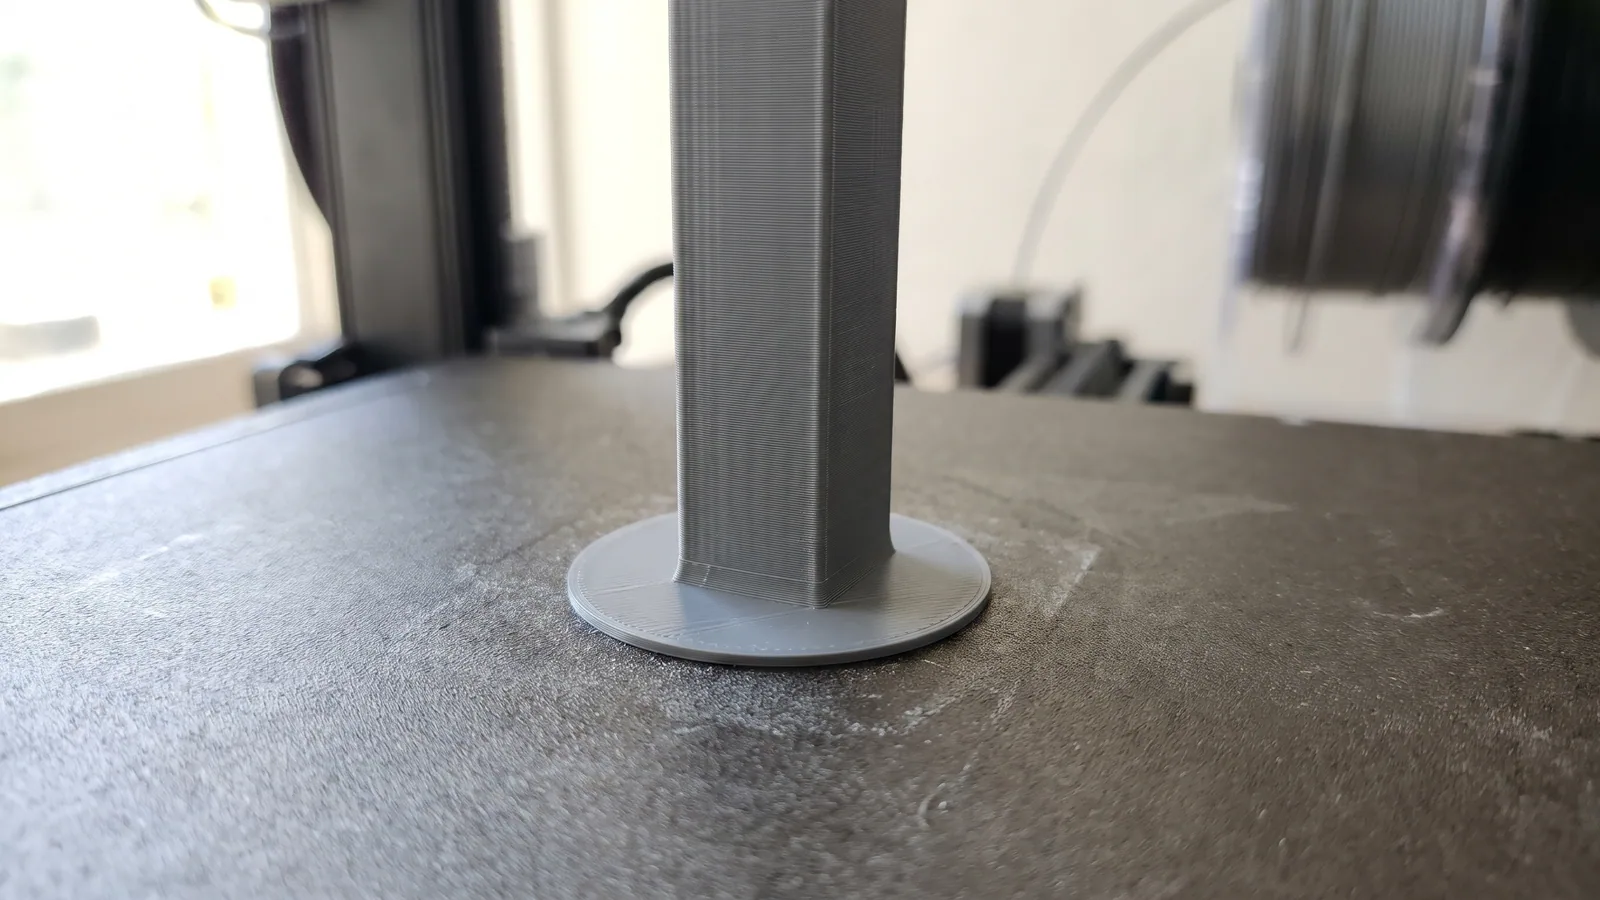
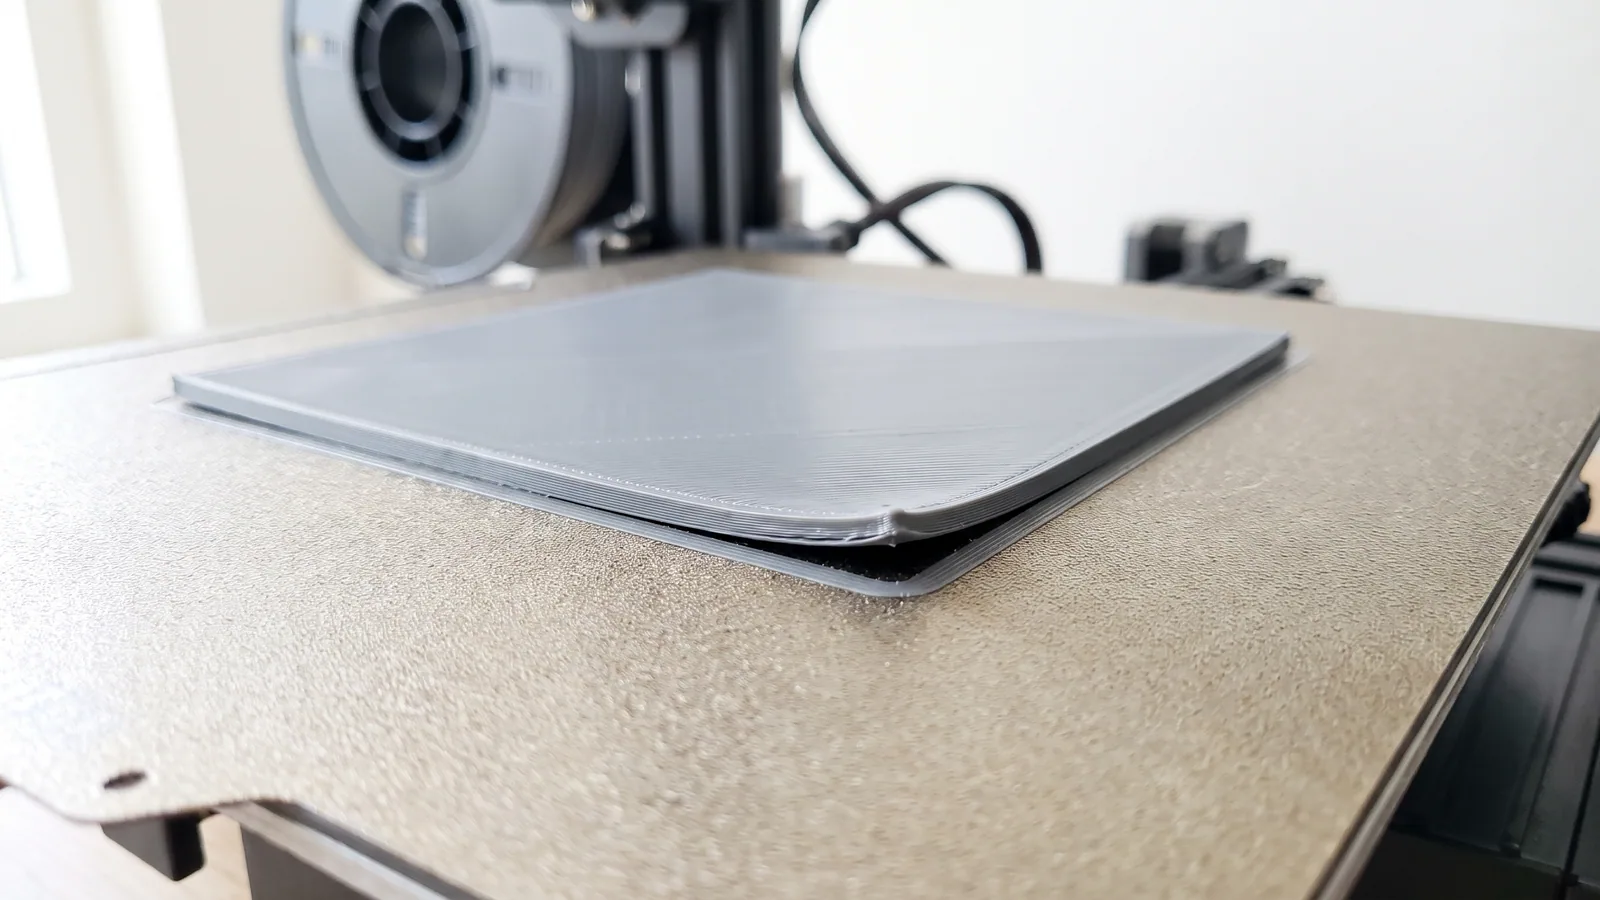
A raft is a flat base of extra plastic printed under the whole part before the part itself starts. It is several layers thick and a little wider than the part. Your print is then built on top of the raft instead of directly on the build plate (the removable sheet the printer prints on).
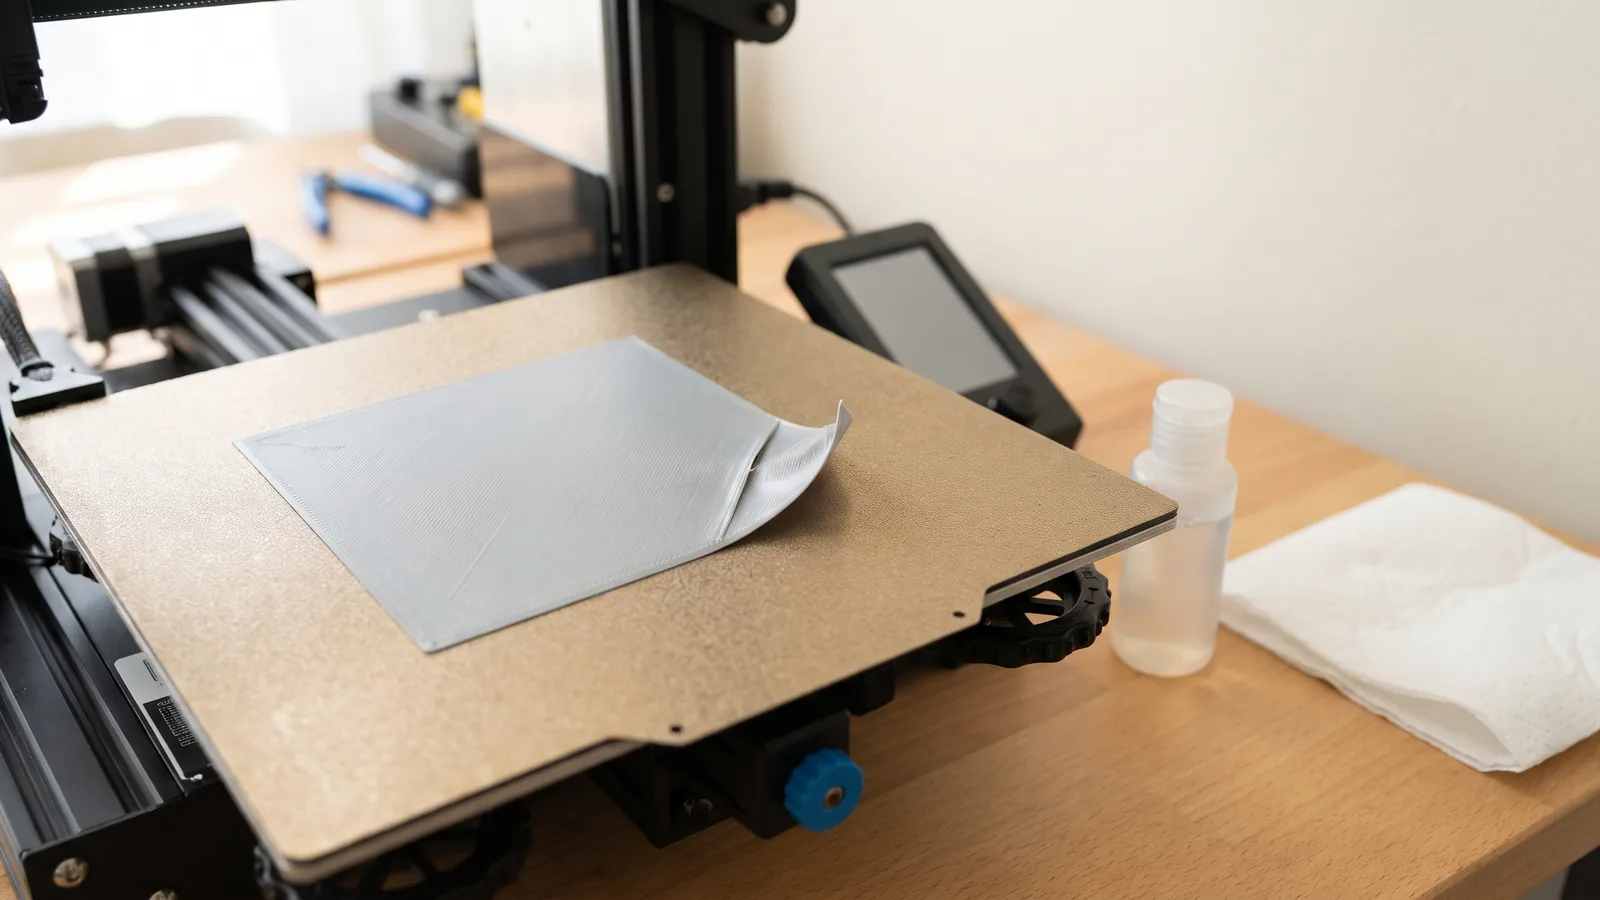
When the print is done, you peel or snap the raft away and throw it out. It is there for one job only: to give the part a stable, well-stuck foundation.
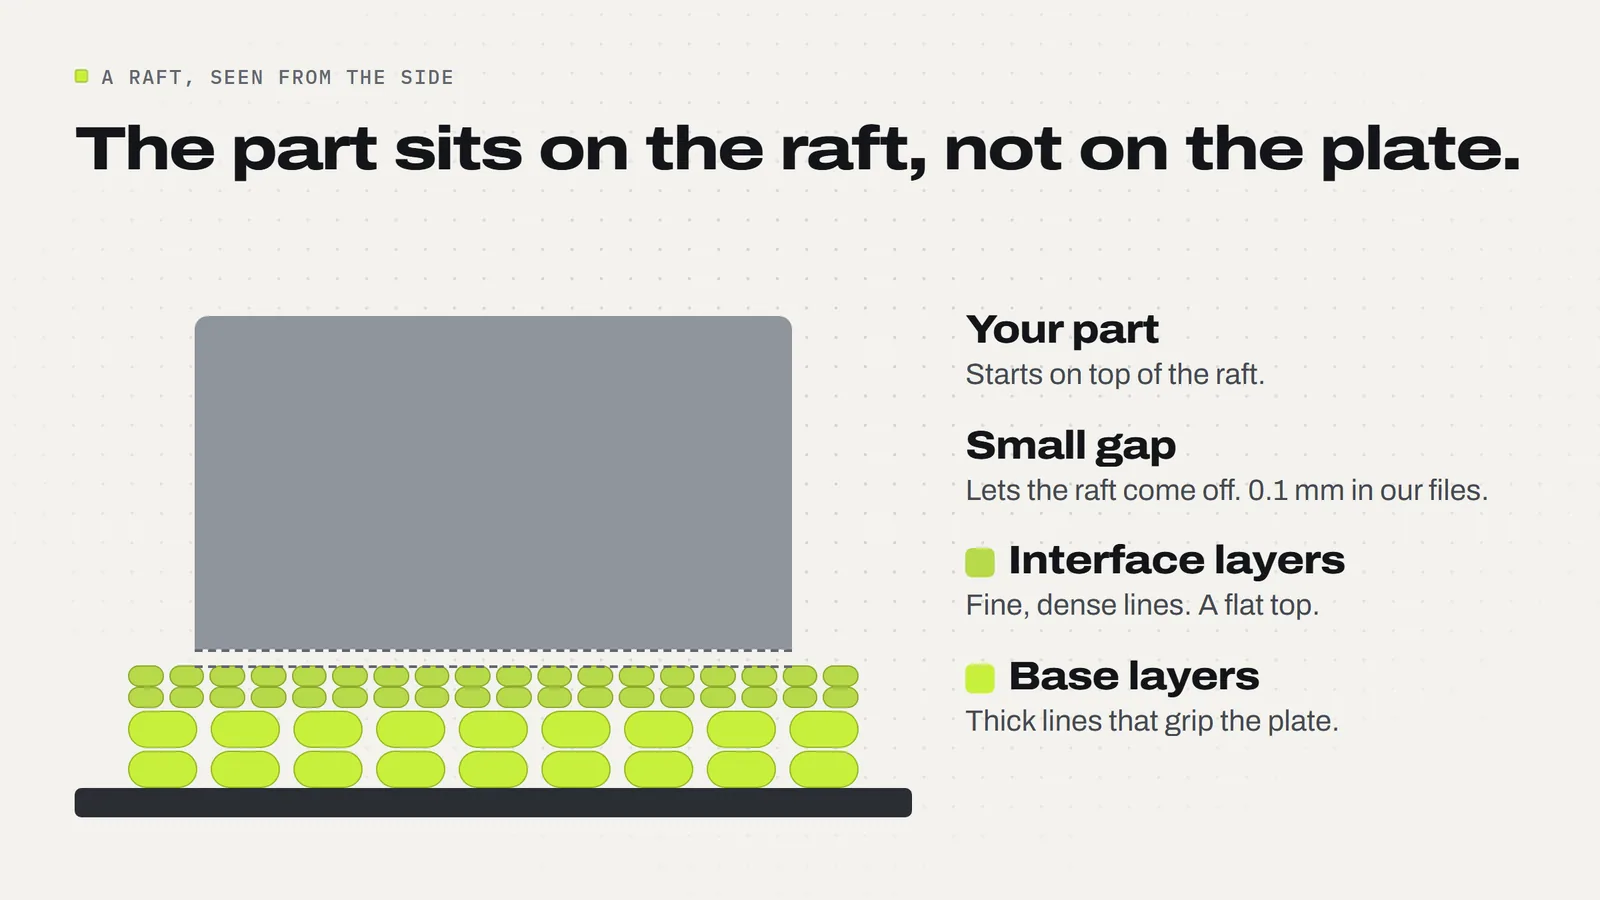
A raft has three parts, from the bottom up. It also ends up thicker than you might expect: the OrcaSlicer wiki notes that raft layers after the first are printed at least 75% of the nozzle width thick, so on a standard 0.4 mm nozzle each one is 0.3 mm or more.
- Base layers. Thick, wide lines laid straight onto the plate. They stick well and smooth over small dips in the surface.
- Interface layers. Finer, denser lines on top that make a flat surface for the part to sit on.
- A small gap. A thin air gap between the raft and the part, so the two separate afterwards. In Bambu Studio this is the raft contact Z distance; every one of our project files saves it at 0.1 mm.
What does a raft do?
A raft solved real problems on older printers. Beds were often bare glass or tape, rarely level, and many machines had no automatic bed leveling. A thick first layer squashed into the plate could fill in the low spots and give the part a flat start, even on a bed that was a little out.
Rafts also help in a few specific ways that still apply today:
- Tiny contact points. A part that touches the plate on a point or a thin edge has almost nothing to grip with. A raft gives that point a wide base to hold on to.
- Warp-prone plastics. Materials that shrink a lot as they cool, such as ABS and nylon, can pull their corners off the plate. A raft spreads that pull over a larger area. We covered why this happens in our guide to 3D print warping.
- A damaged or uneven plate. If the surface has a dent or a worn patch you cannot avoid, a raft prints over it instead of the part.
Raft vs brim vs skirt: what is the difference?
These three get mixed up because they all live on the first layer and all get thrown away. They do very different things.
- A skirt is a loop printed around the part with a gap. It never touches the part. It just gets plastic flowing before the real print starts.
- A brim is a flat ring, one layer thick, joined to the edge of the part. It widens the footprint so the edges grip better. We explain it fully in what is a brim.
- A raft sits under the whole part and lifts it off the plate. It is thicker, uses more plastic, and changes the bottom face of the print.
| Skirt | Brim | Raft | |
|---|---|---|---|
| Where it goes | Around the part, not touching | Around the edge, joined to it | Under the whole part |
| Thickness | Usually one layer | One layer | Several layers |
| Helps the part stick | No | Yes, at the edges | Yes, everywhere |
| Extra plastic and time | Very little | A little | The most of the three |
| Bottom face of the part | Unchanged | Unchanged, small edge to trim | Rougher, slightly droopy |
| Clean-up | Lift it off the plate | Peel it from the edge | Snap and pick it off the bottom |
| In our 540 project files | Not counted here | 81 | 0 |
The short version: if the problem is edges lifting, a brim fixes it with far less mess. A raft is the bigger tool for when the whole base is the problem.
Do you need a raft on a modern printer?
Usually not. Most printers sold today, including every current Bambu Lab model, level the bed automatically and print on a textured or smooth PEI sheet that grips PLA well when it is clean and warm. With that setup the first layer goes down flat on its own, which removes the main reason rafts existed.
Community advice on the Prusa forum says the same: with a well-leveled bed and a PEI surface there is very little reason to use a raft now. The slicers agree in their own way. Bambu Studio ships with raft layers set to 0, and the OrcaSlicer wiki says a value of 0 turns the raft off.
Rafts also have real costs on every print:
- A worse bottom face. The part's first layer is printed onto plastic lines with a gap underneath, not onto a flat plate, so the bottom comes out rougher and slightly sagged between the lines.
- More plastic and more time. Several extra layers under the full footprint, and a little beyond it, add up on a big part.
- Clean-up. A raft has to be pulled off, and small bits can stay stuck in the bottom. On a part with fine detail underneath, that can ruin it.
- Size and fit. Parts that fit together can come out a touch off at the bottom, because the first layer of the part is no longer pressed flat against the plate.
If a print will not stay down, try the simple fixes before a raft: wash the plate with dish soap, make sure the slicer is set to the plate you are using, and add a brim. Our guide to a print not sticking to the bed walks through them in order.
When should you use a raft?
There are still a few times when a raft is the right call. Use one when:
- The part stands on a point or a knife edge and you cannot turn it to a flatter side. A brim and supports usually handle this (more on that below), but a raft is the fallback if they fail.
- The plastic warps badly and a brim was not enough. ABS, ASA and nylon on an open printer are the usual suspects. PLA almost never needs it.
- The bed is uneven and cannot be fixed, for example an older printer without automatic leveling, or a plate with a dent you cannot print around.
- The design calls for it. If the person who made the file says to use a raft in the print notes, follow that. They tested it.
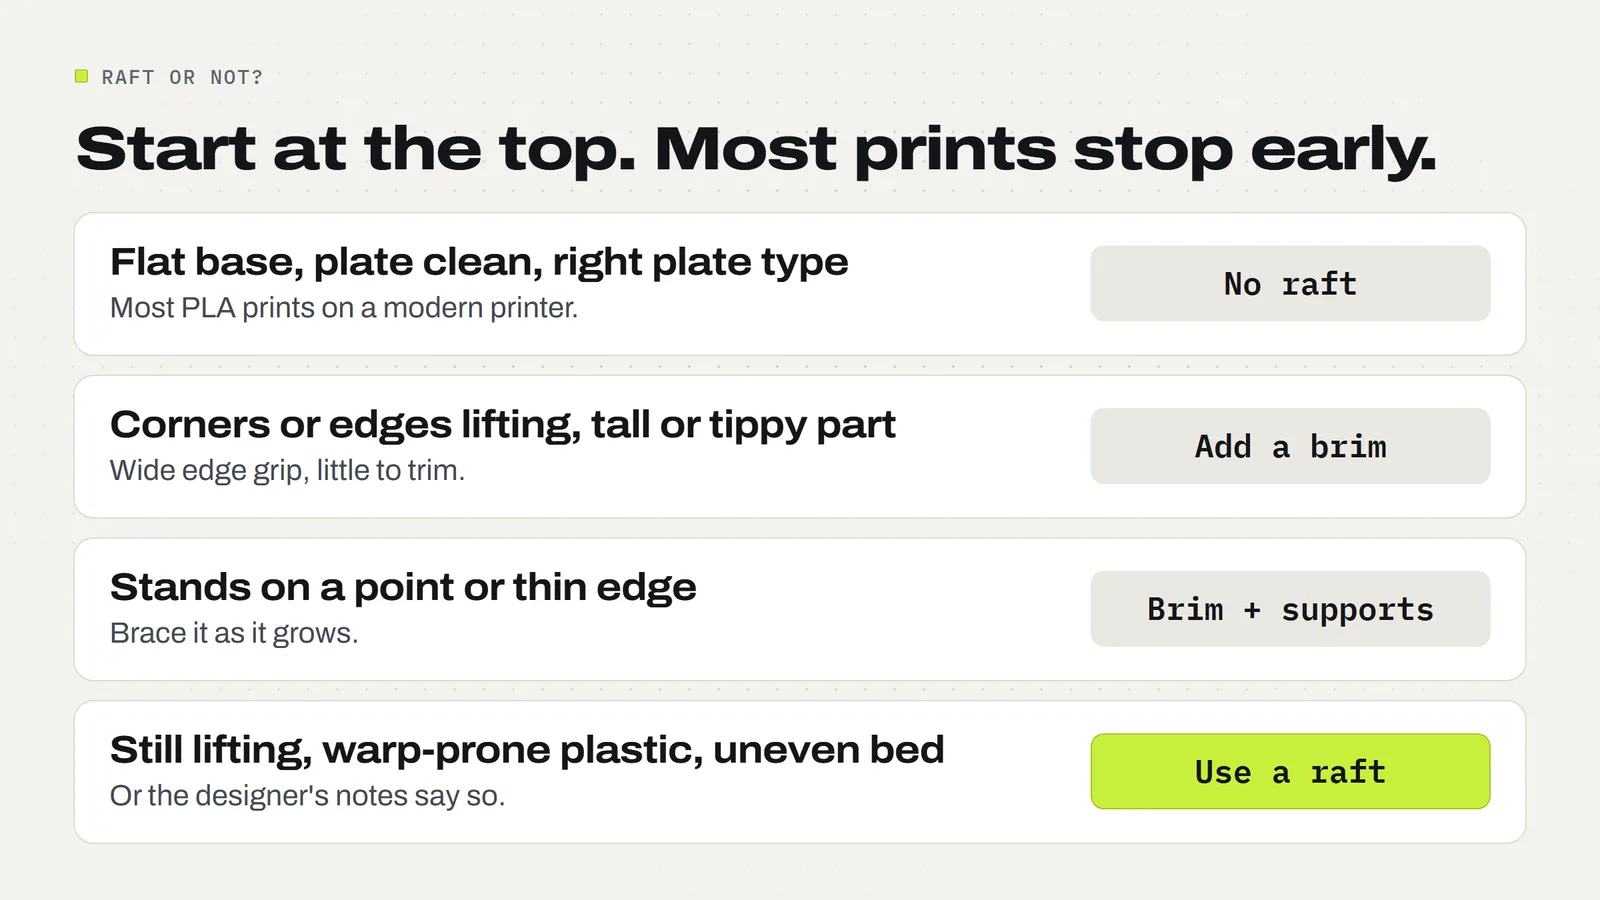
If none of those apply, leave raft layers at 0.
Why none of our 540 project files use a raft
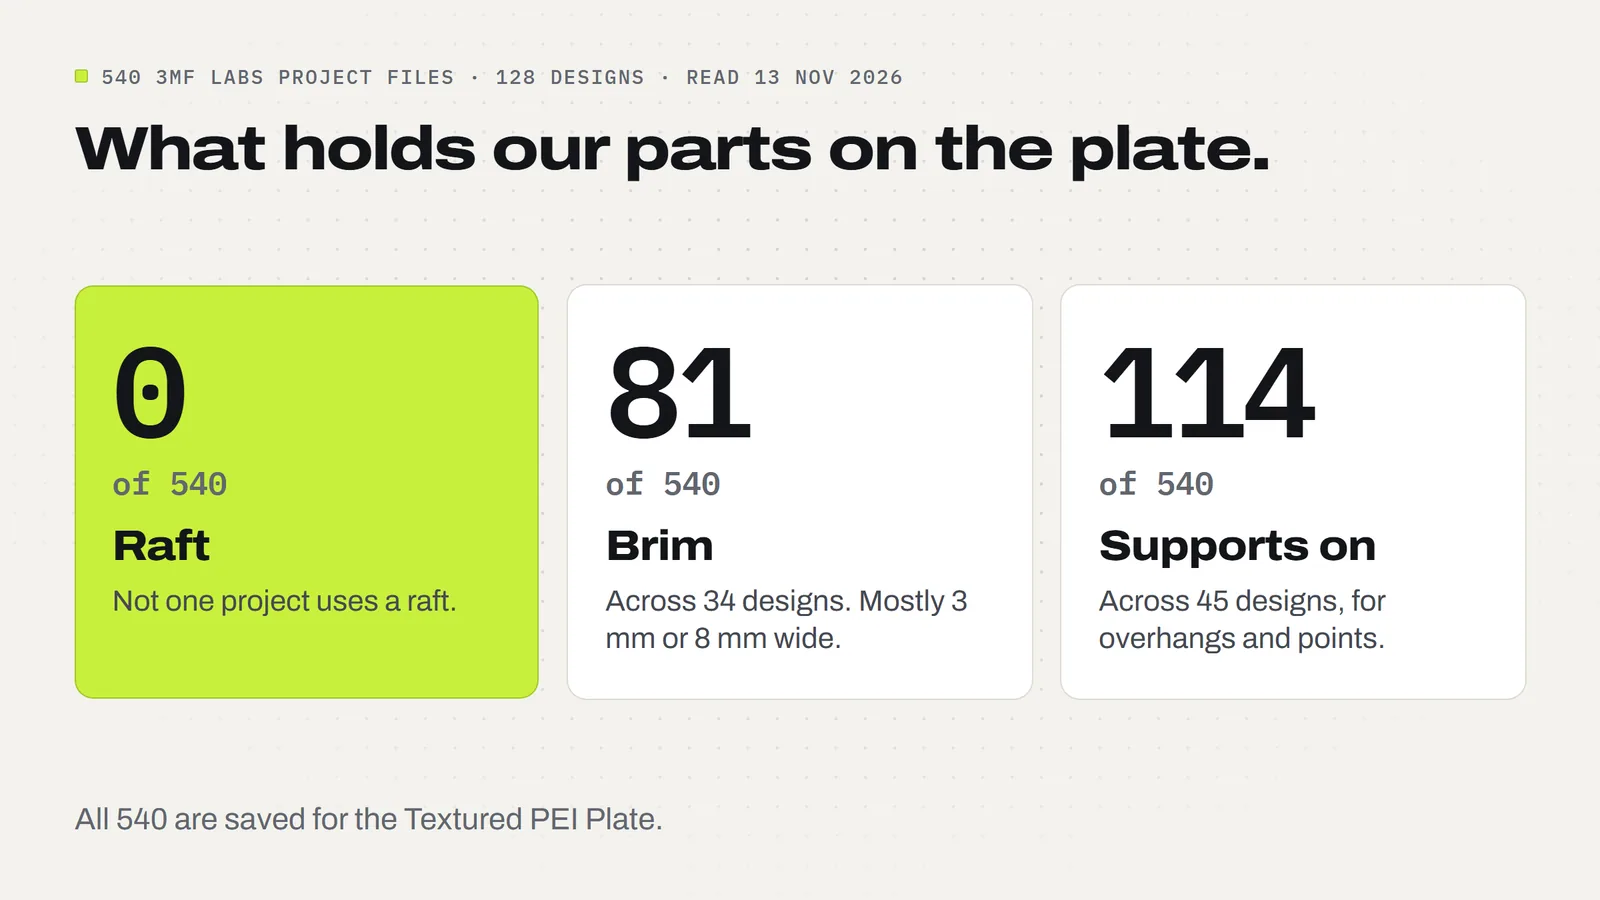
We read the saved print settings inside every project file in our product folders on 13 November 2026: 540 files across 128 designs, all set up for the Textured PEI Plate. Here is what they use to keep parts on the plate:
- Raft: 0 of 540.
- Brim: 81 of 540, across 34 designs. Most are 3 mm or 8 mm wide.
- Supports switched on: 114 of 540, across 45 designs.
The hardest case in the catalog is the Tree top in our Spinning Tops Set. It prints upright, point down, and that rounded point is only 0.9 mm across where it touches the plate. On paper, that is the textbook raft job.
We used an 8 mm brim and supports instead. The brim gives the first layers a wide base, and the supports brace the wide cone and tier lips as the tree grows above that tiny point. The print notes say "No raft" in plain words. Bambu Studio estimates the Tree at 1 h 27 min and 34.25 g of PLA with its supports and brim, and a raft would have added plastic under the whole footprint and left a rougher tip on a toy that has to spin on it.
That is the general pattern: when a part needs help, a brim plus well-placed supports almost always does the job with less waste and a cleaner result. If you are new to supports, our guide on how to add supports in Bambu Studio covers the settings.
How do you add a raft in Bambu Studio?
If you do need one, it takes a few clicks:
- Select the object, or leave nothing selected to change the whole plate.
- In the process settings on the left, open the Support tab.
- Find Raft layers and set it to a number above 0. A small number is plenty: we would start at 3. The OrcaSlicer wiki, whose settings come from Bambu Studio, explains that half the layers (rounded up) become interface layers and the rest base layers, so 3 gives you 1 base layer and 2 interface layers.
- Slice and check the preview. The raft shows up under the part as its own layers.
Turn on Advanced to see the other raft settings. These are the values saved in all 540 of our project files, even with the raft off, which makes them a reasonable starting point:
- Raft contact Z distance: 0.1 mm. The gap between raft and part. Smaller sticks better but is harder to remove; larger releases more easily but leaves a droopier bottom.
- Raft expansion: 1.5 mm. How far the raft reaches past the edge of the part.
- Initial layer density: 90%. How solid the very first raft layer is.
If you bought a ready-made 3MF project, the raft setting is already chosen for you. It is part of what makes the file print-ready. Our guide to what a 3MF file is explains what else gets saved in one.
How do you remove a raft from a 3D print?
- Let the plate cool fully. PLA lets go of PEI as it cools, and the raft separates more cleanly from a cold part.
- Lift the print off with the raft attached. Flex the plate gently rather than prying with a tool.
- Start at a corner. Bend the raft away from the part and peel slowly along one side. Pliers help on a stubborn edge.
- Clean the bottom face. Pick off leftover strands with a deburring tool or craft knife, always cutting away from your fingers. A quick pass with fine sandpaper evens out the texture.
If the raft will not come off at all, the contact gap was too small or the part's first layer was printed too hot. Raise the raft contact Z distance a little for the next print.
Quick raft checklist
- Clean plate and the right plate type in the slicer first.
- Edges lifting? Add a brim, not a raft.
- Part on a point or thin edge? Try a brim plus supports.
- Warp-prone plastic, uneven bed, or the designer says so? Use a raft of a few layers, starting at 3.
- Let it cool before you peel it.
Every one of our 3MF Labs designs comes with the brim, supports and plate settings already saved in the project, plus STL files and a START_HERE guide with plain-English print notes. The license lets you sell the physical prints you make, with no limit and no royalty.
Designs from this guide
 $2.49
3ML-056 · Spinning tops
Spinning Tops Set
Five chunky finger-spun tops, from a classic onion top to a flip top that turns over and a little Christmas tree. STL + 3MF · 32 MB View model $2.49
3ML-061 · Spinning tops
Christmas Spinning Tops
Four Christmas finger tops: a tree with a star, a snowman, a snowflake disc and an ornament that flips over onto its cap. STL + 3MF · 11 MB View model $3.79
3ML-118 · Flexi penguin
Christmas Flexi Penguin
A chubby penguin sliding on its belly in a Santa hat and a knit scarf. The head turns and the body wiggles, and it prints in one piece, already joined. STL + 3MF · 5.7 MB View model $3.79
3ML-025 · Tealight houses
Village Tealight Houses
Four snowy little village houses that glow: a red cottage, an ivory church, a green shop and a gingerbread house, each with a lift-off snow roof over a battery LED tealight. STL + 3MF · 14 MB View model $3.79
3ML-070 · Monitor riser
Monitor Stand
A softly rounded desk riser that lifts your monitor 10 cm, with room to slide a keyboard underneath and a notch at the back for the cables. It goes together by hand: no screws, glue or tools. STL + 3MF · 260 KB View modelQuestions
What is a raft in 3D printing?
A raft is a flat base, several layers thick, printed under the whole part before the part starts. The part sits on the raft instead of the build plate. After printing you peel the raft off and throw it away.
What is the difference between a raft and a brim?
A brim is a one-layer ring joined to the edge of the part; it helps the edges grip. A raft is a thicker mat under the whole part that lifts it off the plate. A brim uses less plastic and leaves the bottom face unchanged.
Raft or brim: which should I use?
Use a brim first. It fixes lifting corners and tippy parts with little waste. Use a raft only when the part stands on a point, the plastic warps badly even with a brim, or the bed is uneven. 81 of our 540 project files use a brim; none use a raft.
Do I need a raft for PLA?
Almost never. PLA shrinks little as it cools and sticks well to a clean, warm PEI plate. A brim is enough for tall, thin or tippy PLA parts. All of our project files are set up for PLA or PETG with no raft.
How many raft layers should I use?
A few is plenty; we would start at 3. The OrcaSlicer wiki explains that half the layers, rounded up, become interface layers and the rest base layers, so 3 gives 1 base and 2 interface layers. Raft layers set to 0 means no raft.
How do I add a raft in Bambu Studio?
Open the Support tab in the process settings and set Raft layers to a number above 0, then slice and check the preview. Turn on Advanced to change the raft contact Z distance, raft expansion and initial layer density.
Why is the bottom of my print rough after using a raft?
The part's first layer is printed onto raft lines with a small air gap underneath, not onto a flat plate, so it sags slightly between the lines. A smaller raft contact Z distance gives a smoother bottom but makes the raft harder to remove.
How do you remove a raft from a 3D print?
Let the plate cool, lift the print off with the raft attached, then bend the raft away from the part starting at a corner. Clean leftover strands with a deburring tool or craft knife, cutting away from your fingers.
Sources
Filed under Printing and slicing