How to Add Supports in Bambu Studio (and Make Them Easy to Remove)
Supports hold up the parts of a model that hang over thin air, then come off in the bin. Here is how to add them in Bambu Studio, and how to make removing them quick and clean.
Supports are the part of 3D printing nobody enjoys. You need them when part of a model hangs out over thin air, and then you have to snap them off afterwards without leaving a mess. Bambu Studio makes the first half easy. The second half takes a few small choices made before you press print.
This guide covers both, in plain English: how to switch supports on, which kind to pick, how to add them only where they are needed, and how to get them off cleanly. The examples come from our own designs, whose saved projects we checked one by one, so you can see when a real model needs supports and when it doesn't.
What are supports in 3D printing?
A 3D printer builds a model one thin layer at a time, from the bottom up. Each new layer has to sit on something. Where a model sticks out sideways, like an arm, a chin or the underside of a roof, the next layer would land on air and droop. That sideways bit is called an overhang.
Supports are a temporary scaffold the slicer adds underneath those overhangs. They print along with the model, hold the overhang up while it prints, and get snapped or cut away at the end. The slicer is the free program that turns a model into instructions for your printer; on Bambu printers that is Bambu Studio. If you are new to it, start with Bambu Studio for beginners.
Most printers handle a gentle overhang without help. The rule of thumb is that a slope up to about 45 degrees from upright prints fine on its own, because each layer is still mostly sitting on the one below. Flatter than that, and you start to need supports.
Does my model need supports?
Often, no. Many models are designed so they print without any. Flat ornaments, earrings, coasters, print-in-place fidgets and flexi animals usually lie flat on the plate with nothing hanging over.
Here is a real number. We opened the saved 3MF project of every design in our shop that has one, 81 in all, and read its support setting. Supports are switched on in 20 of them. The other 61 print with none. The ones that need supports are the shapes you would guess: figures with jaws and chins, bowls with a curled rim, hooks, toppers with wings, and a lantern frame with a roof.
So before you change anything, look at the model and ask two questions:
- Does any part stick out flatter than about 45 degrees? Think chins, outstretched arms, the inside of an arch, a ledge.
- Is there a hole or a hollow that opens sideways? Small round holes usually print fine. Wide, flat ceilings don't.
If both answers are no, leave supports off. You will save filament, time and clean-up.
How to add supports in Bambu Studio
If you bought a ready-made 3MF project, check first: the designer may already have set supports up. Open the file as a project and look at the settings before changing anything. Every one of our projects has the support setting saved, so you can print it as it opens. Here is how to add them yourself on any model.
- Open the model and select your printer and filament. Use File, Open project for a 3MF, or drag in an STL. If you are not sure what a 3MF is, read what is a 3MF file.
- Find the Support tab. On the left of the Prepare screen is the process settings panel, with tabs such as Quality, Strength, Speed and Support. Click Support.
- Tick "Enable support". That is the master switch. With it off, nothing else on the tab does anything.
- Pick a type. The choices are normal or tree, each as auto or manual. Auto adds supports wherever the slicer thinks they are needed; manual only adds them where you mark them. The next section explains which to pick.
- Slice and look at the preview. Press Slice plate. Supports show up in their own color in the preview. Drag the layer slider on the right down through the model and check that every overhang has something under it, and that nothing is filled that doesn't need to be.
That is the whole job for most prints. If the preview looks right, send it to the printer.
Tree or normal supports: which should I use?
Bambu Studio offers two styles of scaffold. Both work. They suit different shapes.
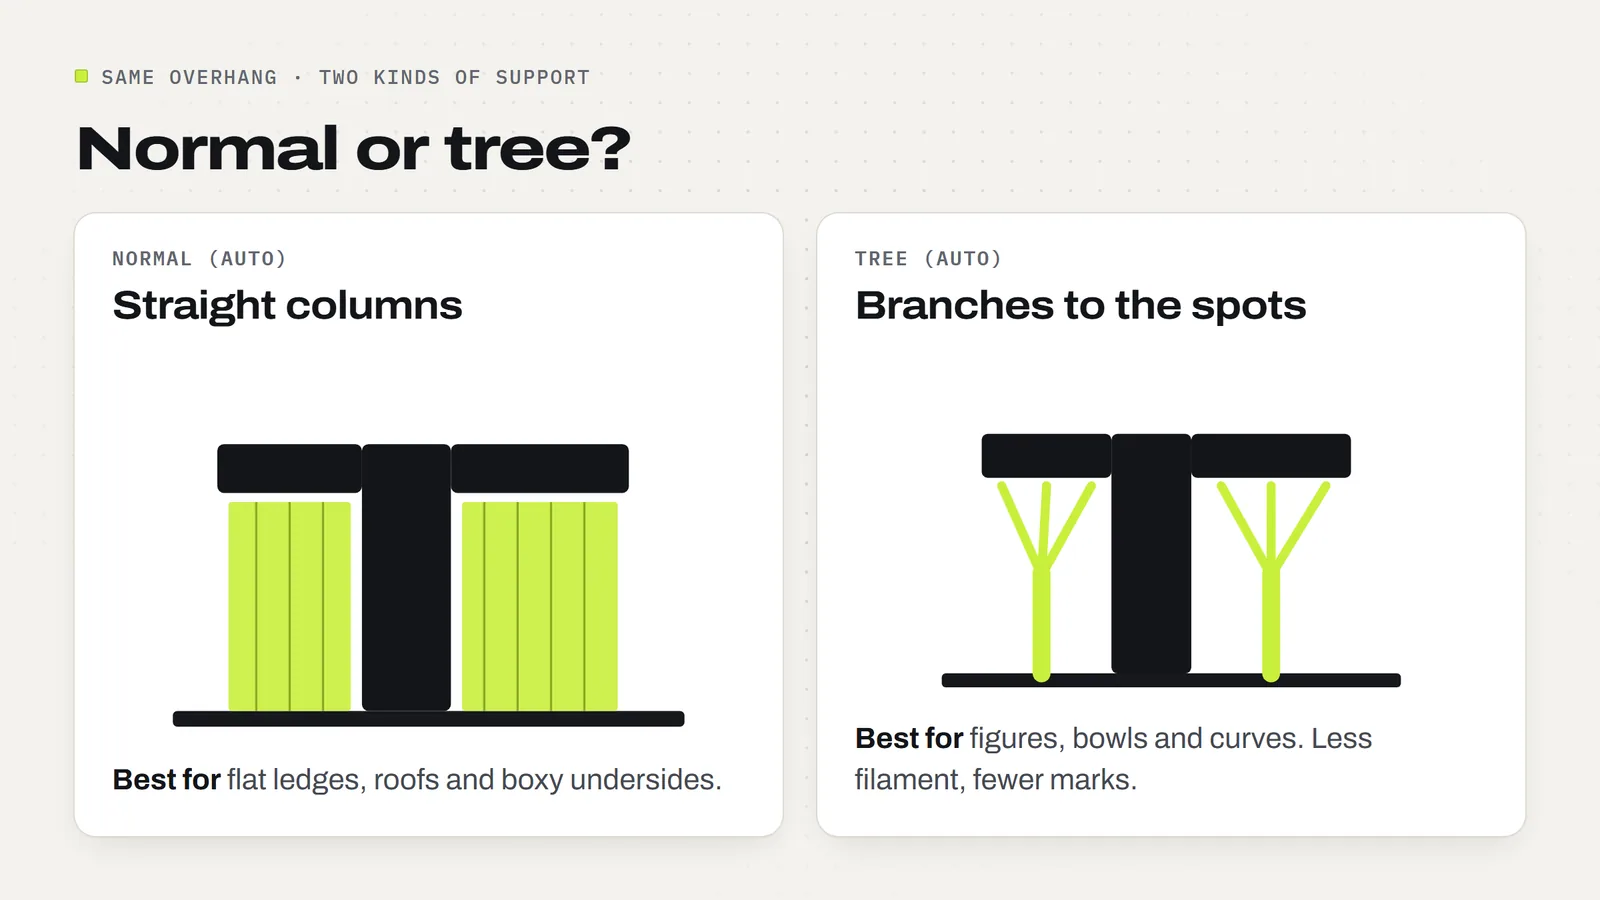
- Normal supports are straight columns, built directly under the overhang down to the plate. They are sturdy and predictable, and they are the easier choice for flat undersides, ledges and big square overhangs.
- Tree supports start as a few trunks on the plate and branch up to touch only the spots that need holding. They use less filament on curvy shapes, touch the model in fewer places and usually pull away in one or two pieces.
| Type | What it does | Best for | In our 20 projects with supports |
|---|---|---|---|
| Tree (auto) | Branches up to every overhang the slicer finds | Figures, bowls, curves, anything organic | 8 (Chattering Skull, Cornucopia Candy Bowl, Stocking Holders...) |
| Normal (auto) | Straight columns under every overhang it finds | Flat ledges, roofs, boxy undersides | 9 (Modular Lantern Frame, Monitor Stand...) |
| Tree (manual) | Tree branches only where you paint them | One small overhang on a model that is otherwise fine | 2 (both Christmas Flexi Sharks) |
| Normal (manual) | Columns only where you paint them | One flat spot you want held up, nothing else | 1 (Christmas Train) |
If you are unsure, try tree (auto) on anything curved and normal (auto) on anything boxy, slice both, and compare. The preview tells you the filament each one will use, so the cheaper and tidier option is easy to spot.
How do I add supports only where they are needed?
Auto supports are cautious. They will happily fill a small hole, prop up a tiny chin that would have printed fine, or crawl up the side of your model. Three settings rein them in.
1. On build plate only. This option on the Support tab stops supports from starting on top of the model itself. They can only grow up from the plate. It is the single best way to avoid scars on a visible surface. The trade-off: an overhang with nothing but model underneath won't get support at all, so check the preview.
2. Threshold angle. This is the slope at which the slicer decides a surface needs support. Bambu's wiki gives the default as 30 degrees, measured from the horizontal: any surface flatter than that gets support in auto mode. A higher number means more support; a lower number means less. Our own projects use 25 to 40 degrees depending on the model, chosen per design.
3. Support painting. This is the precise option. Select the model, choose the support painting tool from the toolbar above the 3D view, and paint straight onto the model. Bambu's wiki calls the two brushes enforcer (always support here) and blocker (never support here). Paint a blocker over a hole you want left clear, or switch to a manual type and paint an enforcer on just the one overhang that needs help. Slice again after painting to see the result.
Got a print-in-place or flexi model? Leave supports off unless the project already has them. Supports that creep into the gaps of a moving joint can glue it shut. Our guide to print-in-place explains why.
How do I make supports easier to remove?
Most of the work of removing supports is decided in the slicer, not with pliers. These are the settings and habits that matter, roughly in order of how much they help.
- Orient the model first. The best support is the one you don't need. Turning a model so its flattest side is on the plate, or so a chin points up instead of out, can halve the support or remove it completely. Rotate, slice, compare.
- Use tree supports on curved shapes. They touch the model at small points instead of along a whole surface, so they come away cleaner.
- Turn on "On build plate only" wherever the preview still shows every overhang held up. Supports that never touch the top of your model can't scar it.
- Leave a slightly bigger gap. The top Z distance is the small air gap between the top of the support and the bottom of your model. Bambu's wiki explains the trade-off plainly: a bigger gap is easier to remove but leaves a rougher underside; a smaller gap looks better but holds on tighter. If supports are welded on, nudge it up one step at a time.
- Use a support interface material if you have an AMS. Bambu sells filaments made for this, such as Support for PLA, which don't stick well to PLA. Printed as just the top layers of the support, they peel away and leave a smooth surface. Our post on whether you need an AMS covers the multi-filament side.
- Dry, clean filament and a cool part. Damp filament strings into supports and makes them messy. Let the print cool fully before you start: warm PLA bends instead of snapping.
How much filament do supports use?
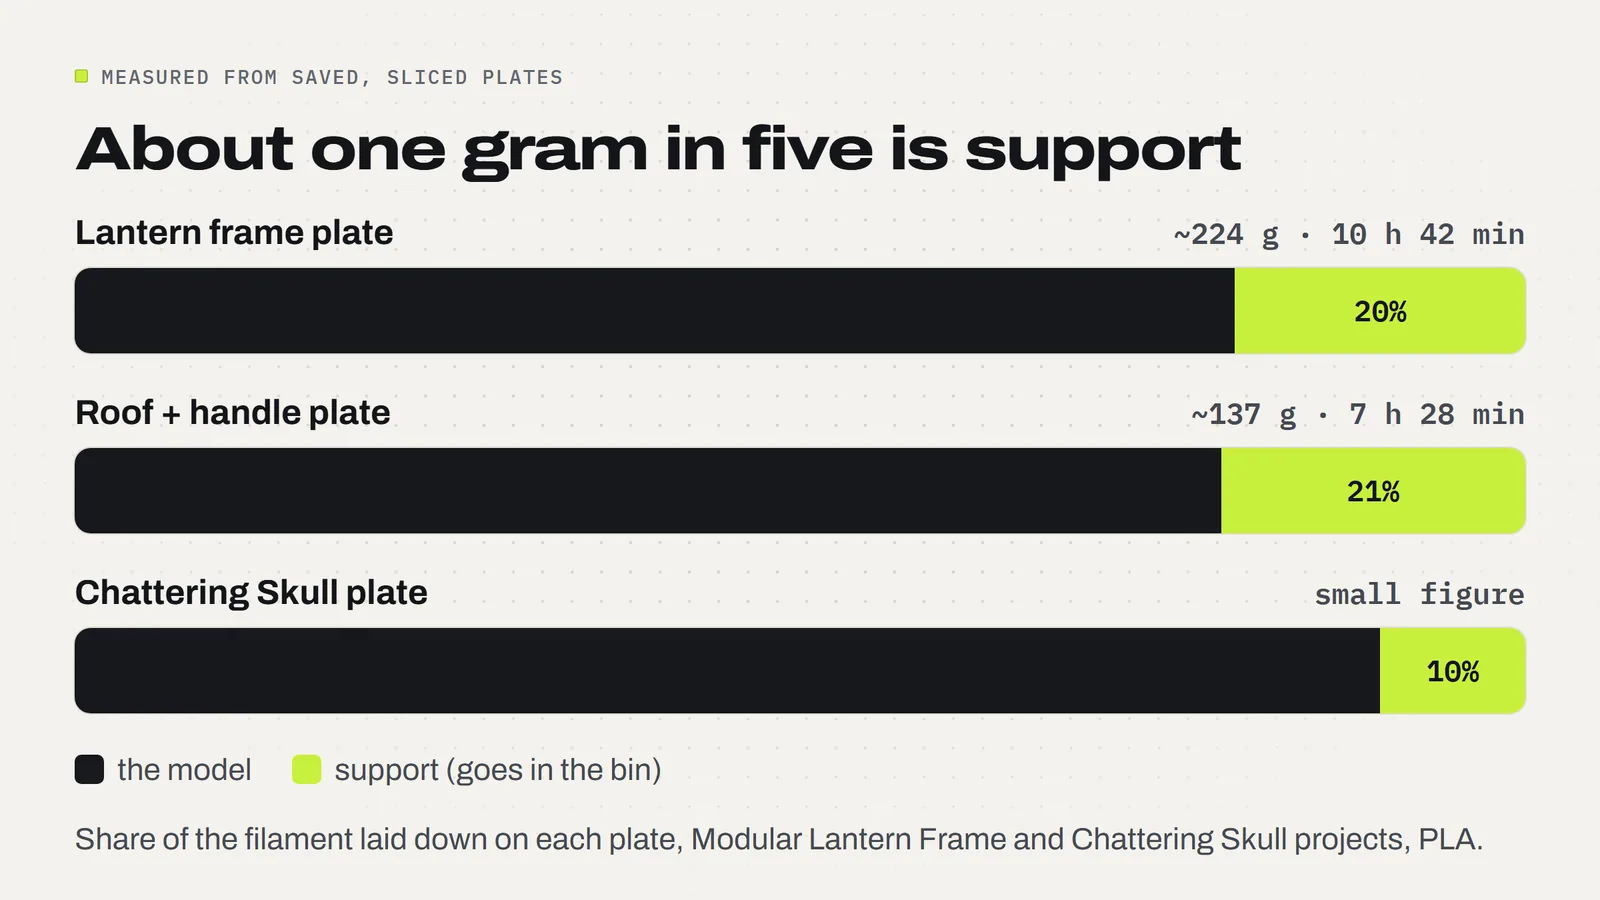
More than people expect, and it is worth knowing when you price prints to sell. We measured the sliced plates saved inside our Modular Lantern Frame project, which uses normal supports for its channels, roof hooks and carrying handle.
The project's own estimate for the frame plate is about 224 g of PLA and 10 h 42 min, supports included. Adding up the support moves in that plate's printer instructions, roughly one gram in every five on the plate goes into support (about 20 percent). The roof and handle plate came out much the same, at about 21 percent. That plastic goes straight in the bin.
Compare that with a small figure like the Chattering Skull, where the same measurement on its saved plate comes out at about 10 percent. Shape decides it. If you are working out what to charge, count support filament as part of the cost; our guide on how to price 3D prints shows the math.
How to remove supports from a 3D print
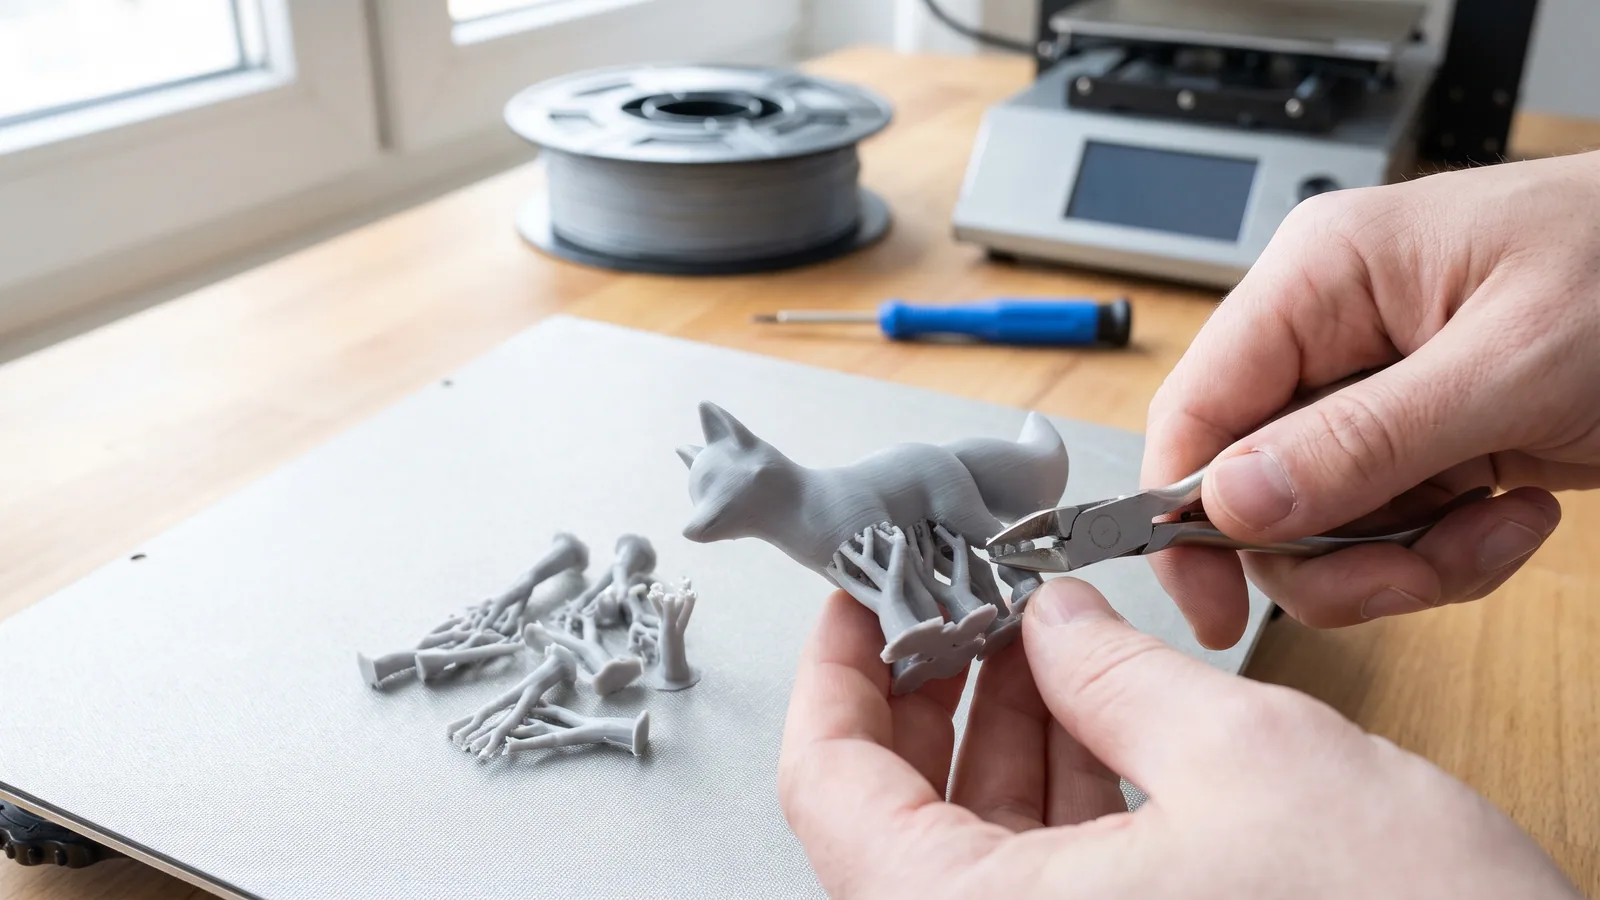
With the slicer settings right, removal takes minutes. A few tools make it easier: a pair of flush cutters (small snips that cut flat), needle-nose pliers, and a deburring tool or a craft knife for the last bits. Wear safety glasses; little shards of PLA fly.
- Let it cool all the way. Take the plate off the printer and flex it to release the print. Wait until the part is at room temperature.
- Take off the big pieces first. For tree supports, grab the trunk near the plate and twist or rock it; the branches usually come away together. For normal supports, wiggle the block side to side until it lets go.
- Clip, don't pry, near delicate parts. Around thin details, hooks or hinges, snip the support with flush cutters instead of levering against the model. A pried support can take a thin detail with it.
- Clean up the scars. Shave any nubs with a deburring tool or knife, cutting away from yourself. Light sanding hides the rest on a matte surface.
- Clear holes and joints. If the model has holes, pivots or moving parts, pick out every bit of support in them before you assemble it. Our lantern frame's START_HERE guide, for example, lists exactly where to clear: the frame channels, the roof hooks, the release tab and around the handle.
What if my supports fail or won't come off?
- The overhang drooped anyway. The support wasn't there or wasn't touching. Check the preview for gaps, raise the threshold angle a little, or paint an enforcer on that spot.
- Supports fell over mid-print. Tall, thin supports can wobble loose. Tree supports with a wider base, a brim, or slowing down usually fix it. Clean the plate too; a greasy plate lets supports pop off.
- Supports are fused on. The top Z distance is too small for your filament. Raise it a step, or use a support interface material.
- Supports filled a hole. Paint a blocker over the hole, or switch on "On build plate only".
Why ready-made projects save you the guesswork
Every design on 3MF Labs downloads as a 3MF project with the support setting already chosen and saved, plus the STL files for any other slicer and a START_HERE guide in plain English that says where supports go and how to remove them. If a design needs supports, the project has them set; if it doesn't, they are off. You open it and print. See all our designs, read STL vs 3MF if you print on another brand, and check the license: you are free to sell the physical prints you make, with no limit and no royalty.
Designs from this guide
 $2.49
3ML-012 · Lantern frame
Modular Lantern Frame
The Modular Lantern's frame, roof and carry handle. Print it once, then slide in a set of panels for every season. STL + 3MF · 2.0 MB View model $2.49
3ML-006 · Fidget keychain
Chattering Skull
A two-color skull keychain whose jaw swings and clacks. 3MF · 8.9 MB View model $3.79
3ML-017 · Candy bowl
Cornucopia Candy Bowl
A woven-look cornucopia horn that holds wrapped candy, with a curled tail and a harvest cluster that hooks over the rim. STL + 3MF · 12 MB View model $5.99
3ML-016 · Mantel decor
Christmas Stocking Holders
Four weighted stocking holders for the mantel: a nutcracker soldier, a snowman, a Christmas tree and a gingerbread house. STL + 3MF · 9.2 MB View modelQuestions
How do I turn on supports in Bambu Studio?
Open the model, go to the process settings on the left of the Prepare screen, click the Support tab and tick Enable support. Choose a type, such as tree (auto) or normal (auto), then slice and check the preview.
Should I use tree or normal supports?
Tree supports suit curved, organic shapes like figures and bowls: they use less filament and touch the model in fewer places. Normal supports suit flat ledges, roofs and boxy undersides. Slice both and compare the preview if you're unsure.
What does On build plate only mean?
It stops supports from starting on top of the model. They can only grow up from the plate, so they never scar a visible surface. Overhangs with only model underneath won't get support, so check the preview.
How do I add supports to just one spot?
Switch the support type to tree (manual) or normal (manual), then use the support painting tool to paint an enforcer on the overhang that needs it. Slice again to see the result.
How do I stop supports filling a hole?
Use the support painting tool and paint a blocker over the hole, or turn on On build plate only. Slice again and check the hole is clear in the preview.
How do I make supports easier to remove?
Orient the model to need less support, use tree supports on curved shapes, raise the top Z distance a step if they're fused on, and let the print cool fully before removing them. With an AMS, a support interface filament peels away cleanly.
What is the best way to remove supports from a 3D print?
Let the print cool, take off the large pieces first by twisting the tree trunk or wiggling the block, snip near delicate details with flush cutters instead of prying, then shave any nubs with a deburring tool. Wear safety glasses.
Do all 3D prints need supports?
No. Of the 81 saved projects in our shop, only 20 have supports switched on. Flat ornaments, earrings, coasters, fidgets and print-in-place toys usually print with none.
Filed under Printing and slicing