What Is a Brim in 3D Printing (and When You Need One)
A brim is the flat ring of plastic your slicer adds around the bottom of a part. Here is what it does, how it differs from a skirt and a raft, and when to use one, with the brim settings saved in our own projects.
You open a project in your slicer, press slice, and a flat ring of plastic appears around the bottom of the part that was never in the model. Or a print guide says "keep the brim on" and you are not sure what that means. Either way, the brim is one of the first odd words a new printer owner runs into, and it matters more than it sounds: it is often the difference between a part that finishes and one that ends up in the bin halfway through.
This guide explains what a brim is, how it differs from a skirt and a raft, when a print needs one, and how to add or remove one in Bambu Studio. It uses the brim settings saved in our own ready-to-print designs as the worked example, so the numbers are real ones, not rules of thumb.
What is a brim in 3D printing?
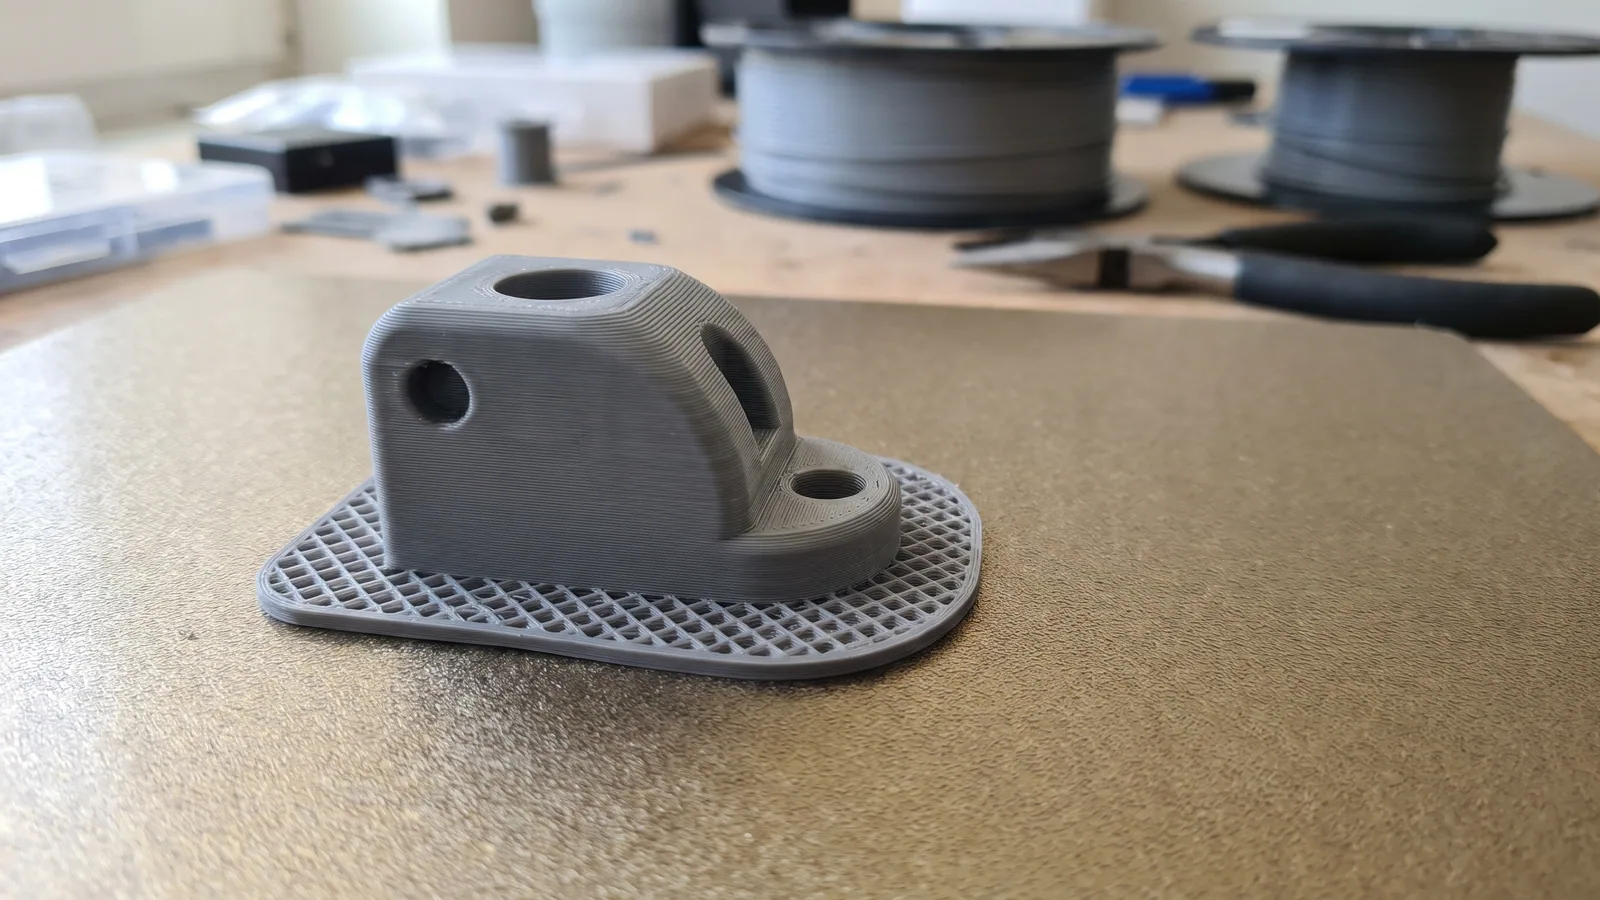
A brim is a flat ring of extra plastic printed around the base of a part, on the first layer only. It is one layer thick, joined to the edge of the part, and it spreads outward across the build plate (the removable sheet the printer prints on) like the brim of a hat.
Its job is grip. The more plastic touching the plate, the harder the part is to knock over or pull up. A brim adds that contact around the edge without changing the part itself. When the print is done, you peel it off by hand and throw it away.
Two numbers describe a brim:
- Width: how far it spreads out from the part, in millimeters. Ours range from 2 mm to 8 mm.
- Gap: a tiny space left between the brim and the part so it snaps off cleanly. Ours are 0.1 to 0.15 mm, thinner than a sheet of paper.
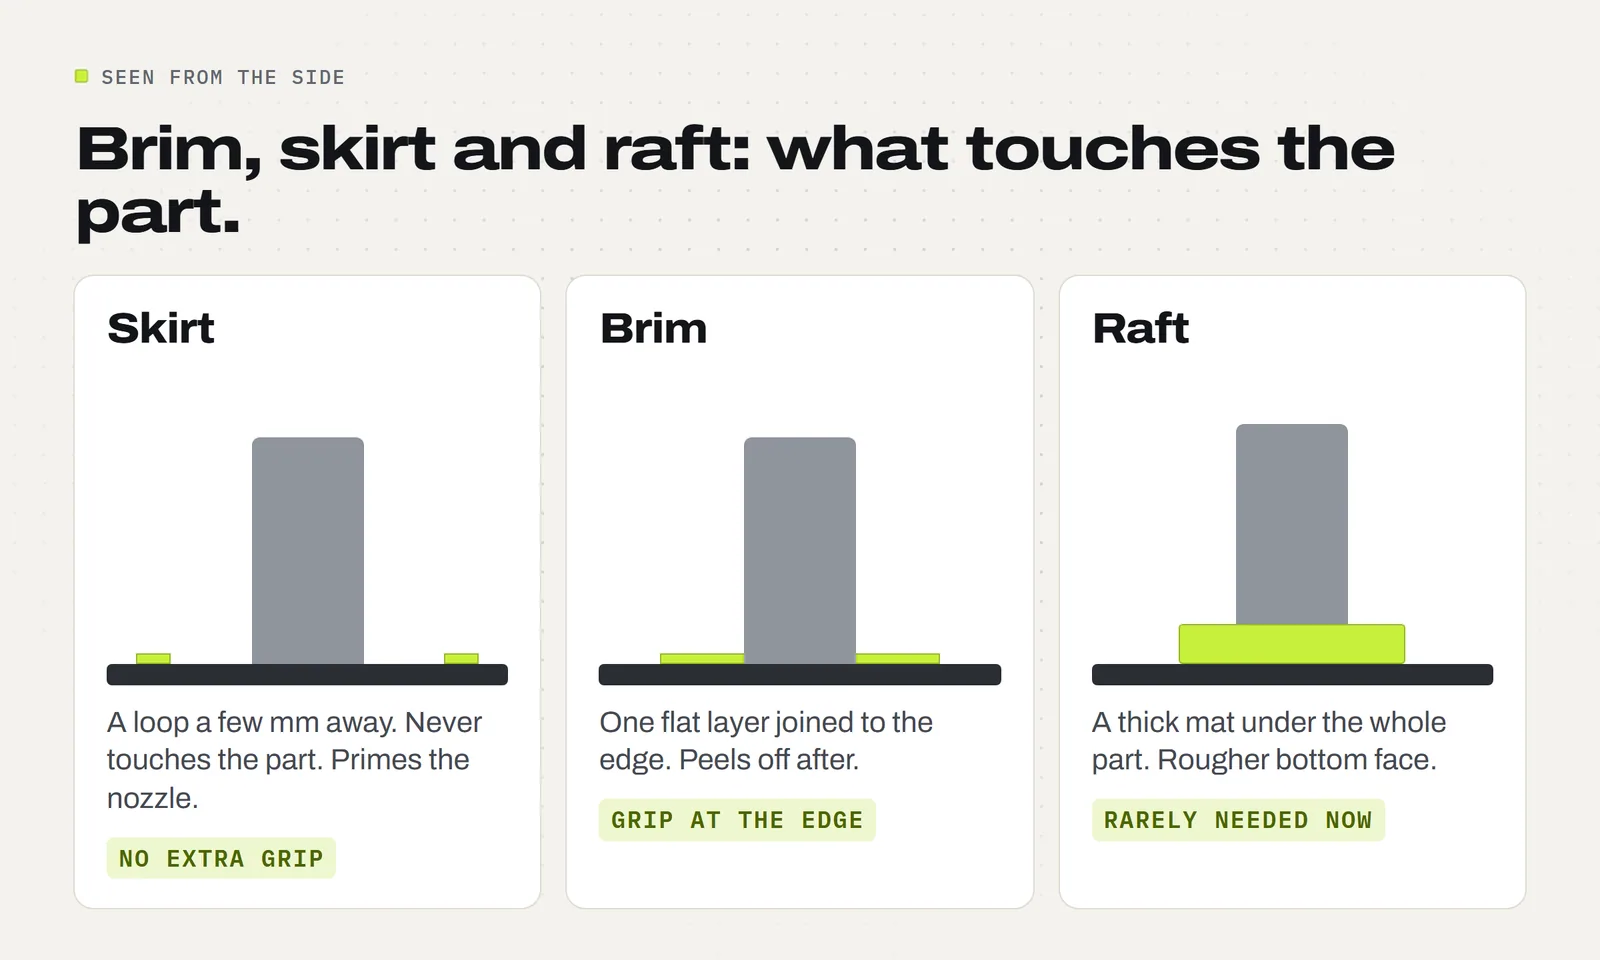
What is the difference between a brim, a skirt and a raft?
These three get mixed up because they all print on the first layer around or under the part. They do quite different jobs.
- A skirt is a loop drawn around the part, with a gap between them. It never touches the part. It just gets the plastic flowing before the real print starts and shows you the printing area. It does nothing for grip.
- A brim is joined to the edge of the part. It adds grip and fights curling corners.
- A raft is a thick mat of several layers printed underneath the whole part. The part sits on top of it. Rafts were common on older printers with bumpy, unheated beds. On a modern printer with a heated, level plate they are rarely needed, and they leave a rougher bottom face. Our guide to what a raft is covers the few cases where one still helps.
| Option | Where it prints | Touches the part? | Main job | Cleanup |
|---|---|---|---|---|
| Skirt | A loop around the part, a few mm away | No | Primes the nozzle, checks the first layer | None, lift it off the plate |
| Brim | A flat ring around the edge, one layer thick | Yes, at the edge | Grip, stops corners lifting, steadies tall parts | Peel off, trim any whiskers |
| Brim ears | Small round pads at chosen corners | Yes, at the corners only | Pins sharp corners down | Peel off a few small pads |
| Raft | A multi-layer mat under the whole part | Yes, the whole bottom | A base for uneven beds or tricky materials | Pry the part off, rougher bottom face |
| Nothing | Just the part | - | Fine for most parts with a good footprint | None |
In practice, on a Bambu Lab printer, the choice is almost always between no brim and a brim. Across the 454 project files behind our designs, not one uses a skirt or a raft.
Do I need a brim on every print?
No. Most prints do not need one. A part with a wide, flat bottom on a clean plate stays put on its own, and a brim on it only adds cleanup.
Our own files show it. We read the saved settings from all 454 3MF project files behind our designs on 10 November 2026: 76 have a brim saved, and the other 378 print without one. That is about one project in six. Where we do use one, the reason is something you can see on the plate:
- A tiny contact point. A part that touches the plate on a point or a small dot gets nudged by the nozzle every layer.
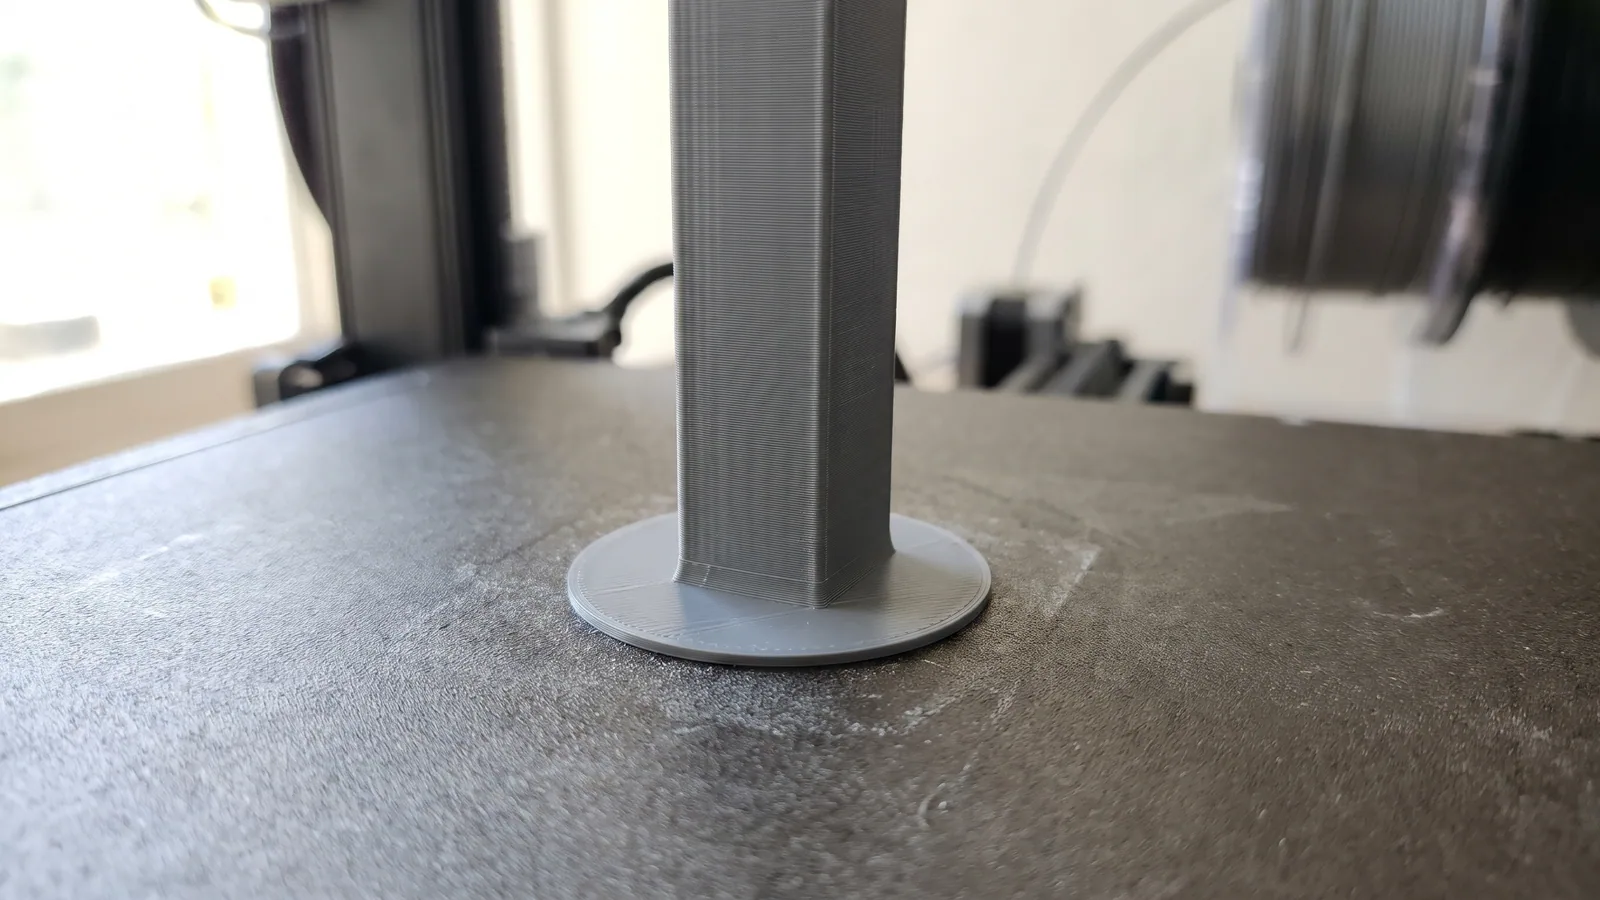
- Tall and thin. The taller a part is compared with its footprint, the more it wobbles as it grows.
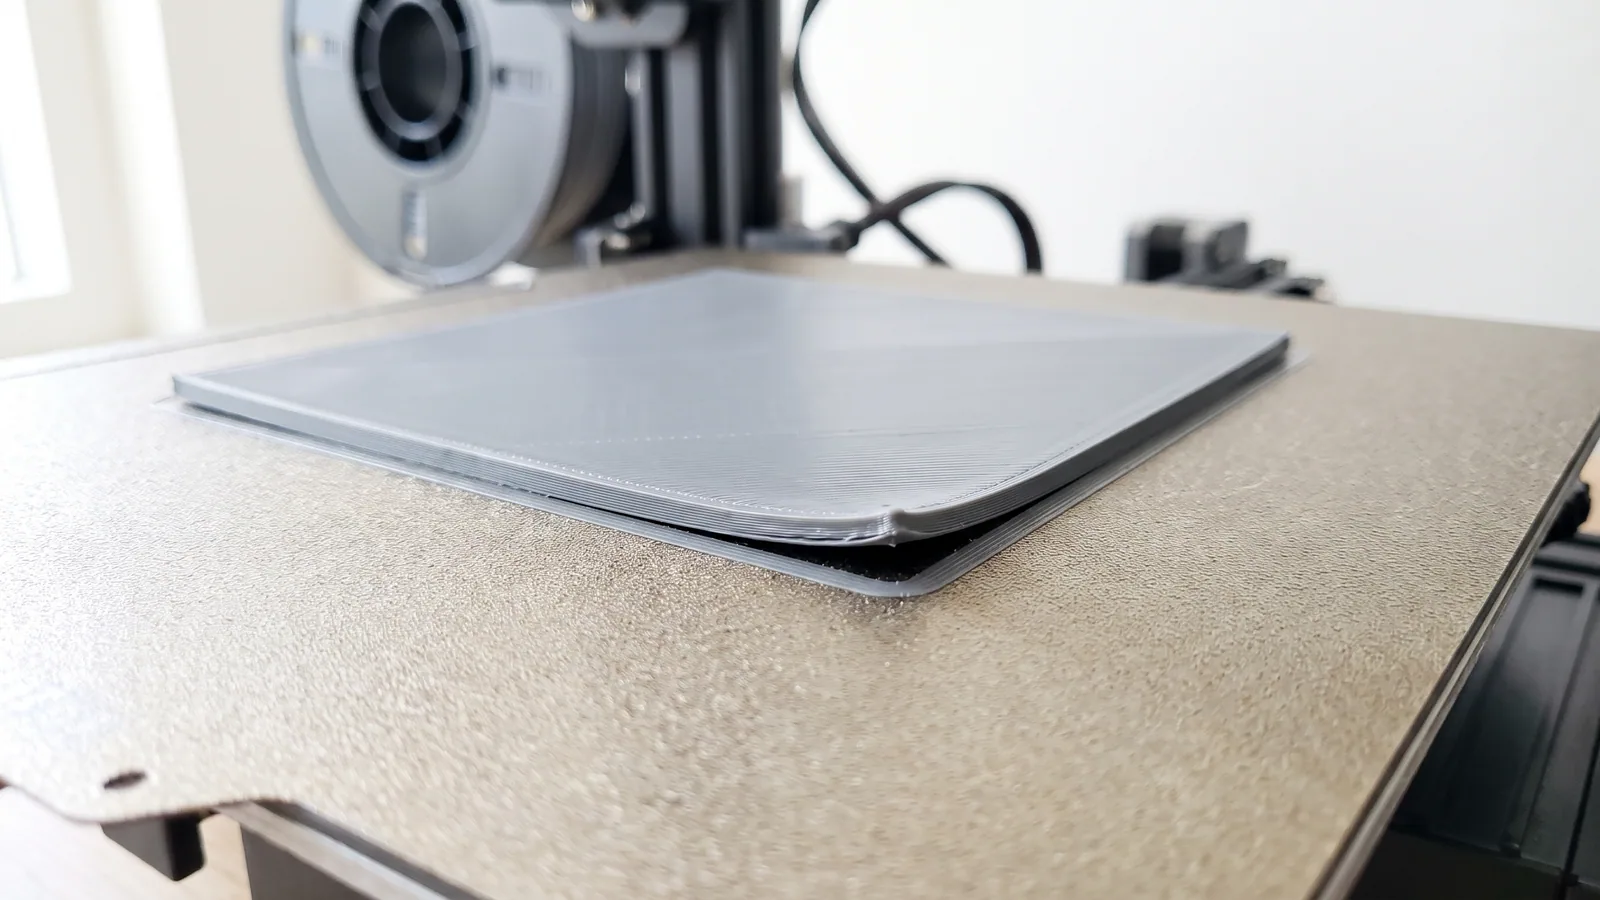
- Long, flat pieces. Plastic shrinks a little as it cools. On a long flat part that shrinking pulls the corners up. That is called warping.
- Small parts with sharp corners. Little pieces have little grip, and sharp corners are where lifting starts.
If none of those describe your part, start without a brim. If it lifts, wash the plate first (see our guide to prints not sticking to the bed), then add a brim.
When does a brim help? Real examples from our designs
Here is how the 76 brims in our projects break down by width, and the designs behind them.
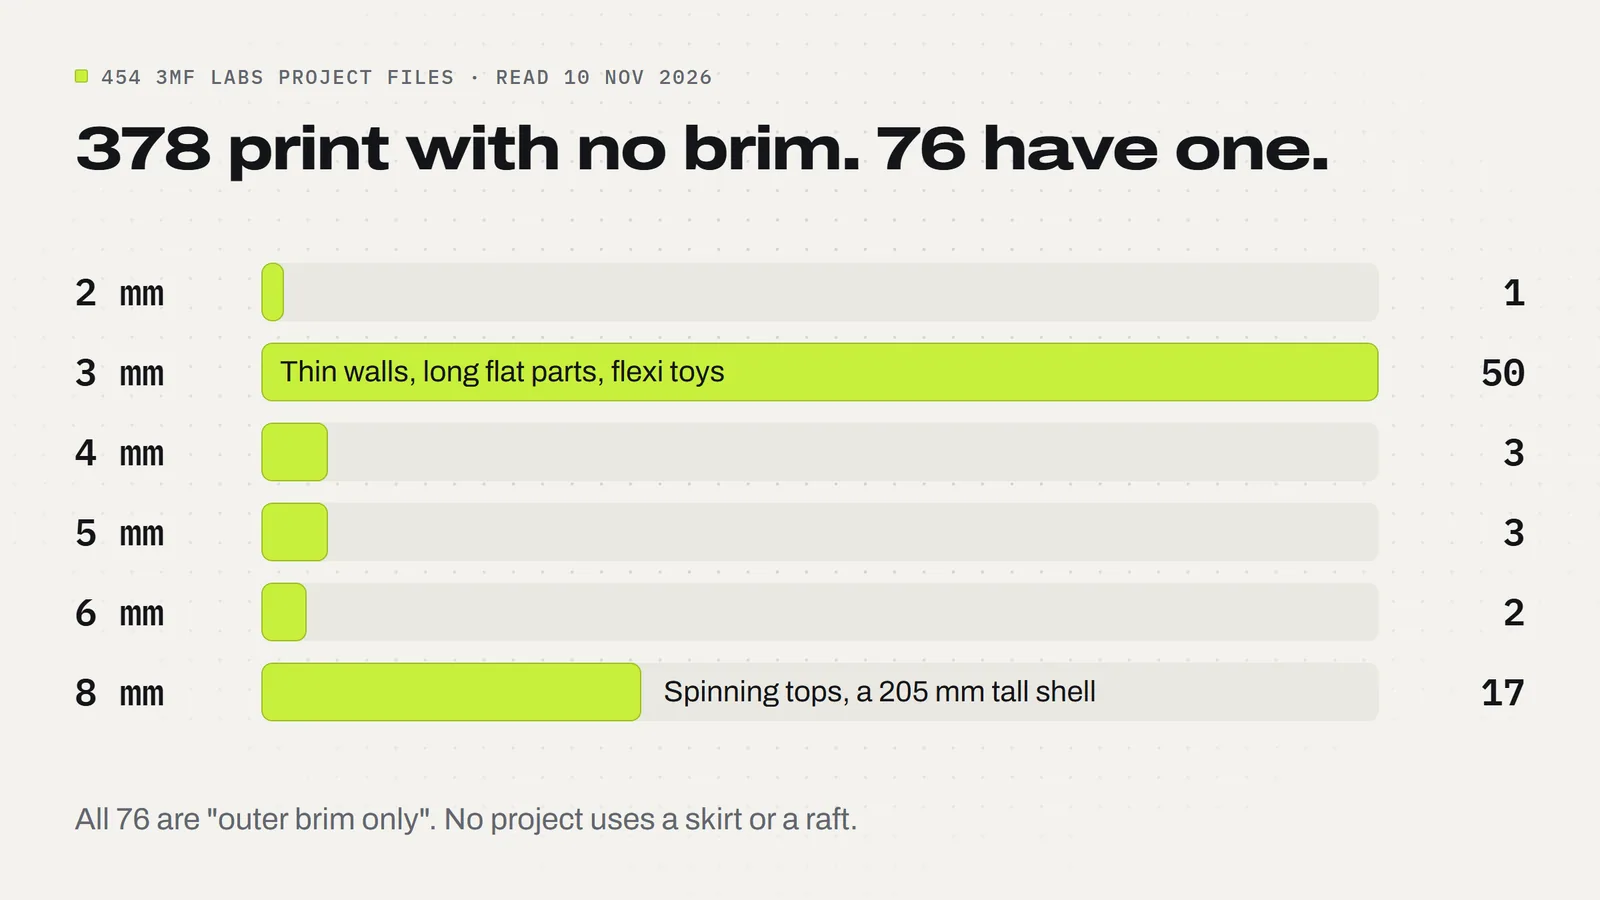
- 8 mm brim, spinning tops. Every top in the Spinning Tops Set and the Christmas Spinning Tops has an 8 mm brim. The tree-shaped top even prints point down, star up, so its whole height grows from a tiny tip. The project's own print notes say to keep the brim and supports on.
- 8 mm brim, a tall shell. The bedding piece in the Elf Furniture Set stands on its end, 205.2 mm high. A wide brim, together with slower moves, keeps it steady all the way up. The chair and table in the same set only need 3 mm.
- 3 mm brim, thin upright walls. The house walls in the Village Tealight Houses print upright with an open bottom, so the plate only touches a thin outline. A 3 mm brim with a 0.1 mm gap holds that outline down.
- 3 mm brim, long flat parts. The shelf halves and legs of the Monitor Stand are long, flat pieces where a lifted corner would show. A narrow brim is enough to stop it.
- 3 mm brim, small flexi toys. The Christmas Flexi Penguin and the Articulated Reindeer print in one piece with their joints already formed. They are small and light, and a 3 mm brim keeps them from shifting while the joints build. (More on these in our print-in-place guide.)
- 4 to 6 mm, in between. The Cornucopia Candy Bowl uses 4 mm, the Playing Card Holder 5 mm and the Filament Spool Holder 6 mm.
Two patterns stand out. Half of our brims are 3 mm, which is a good starting width for most things. And the 8 mm brims go on parts that are tall compared with a small footprint, which is exactly where a brim earns its keep.
How do I add a brim in Bambu Studio?
Bambu Studio is the free slicer for Bambu Lab printers. OrcaSlicer, which grew out of it, uses the same names. If you open one of our 3MF projects, the brim is already set where a part needs one, so there is nothing to do. To add one yourself:
- Select the plate or the part.
- In the print settings panel on the left, open the Others tab.
- Find Brim type and pick Outer brim only.
- Set Brim width. Start at 3 mm, go to 5 to 8 mm for tall or tippy parts.
- Leave the brim-object gap small (0.1 mm is what most of our projects use) so the brim snaps off cleanly.
- Slice and look at the preview. The brim shows up as a flat ring on layer one.
You can also set a brim for just one part on a crowded plate. Right-click the part in the object list, add a setting for it, and change its brim type there. That way a single tall piece gets a brim and the rest of the plate stays clean.
If you are still finding your way around the app, our Bambu Studio beginner's guide walks through opening a project and printing it in five steps, and what a 3MF file is explains why a project opens with these settings already saved.
What do the Bambu Studio brim types mean?
The Brim type menu has more choices than most people need. In plain English:
- Auto: the slicer decides whether a part needs a brim. Handy, but you do not always know what you will get.
- Outer brim only: a brim around the outside edge. This is the one to use almost every time, and it is what all 76 of our brims are.
- Inner brim only: a brim inside a hollow part, such as the inside of a ring, and nothing outside.
- Outer and inner brim: both. Useful for big rings or frames that can curl inward and outward.
- Painted: lets you add brim ears, which come next.
- No brim: exactly that.
What are brim ears (mouse ears)?
Brim ears, also called mouse ears, are small round pads placed only at the corners of a part instead of a full ring. Corners are where warping starts, so pinning just the corners gives most of the grip with far less to peel off afterwards.
In Bambu Studio, set the part's brim type to Painted, then use the brim ears tool to click points on the part or let it place them on sharp corners automatically. Bambu Lab's wiki notes that the ears disappear when you leave the tool and only show again after you slice, which catches a lot of people out. Ears suit boxy parts with sharp corners. For a part that is tall and tippy, a full brim is still the better choice.
How do you remove a brim from a 3D print?
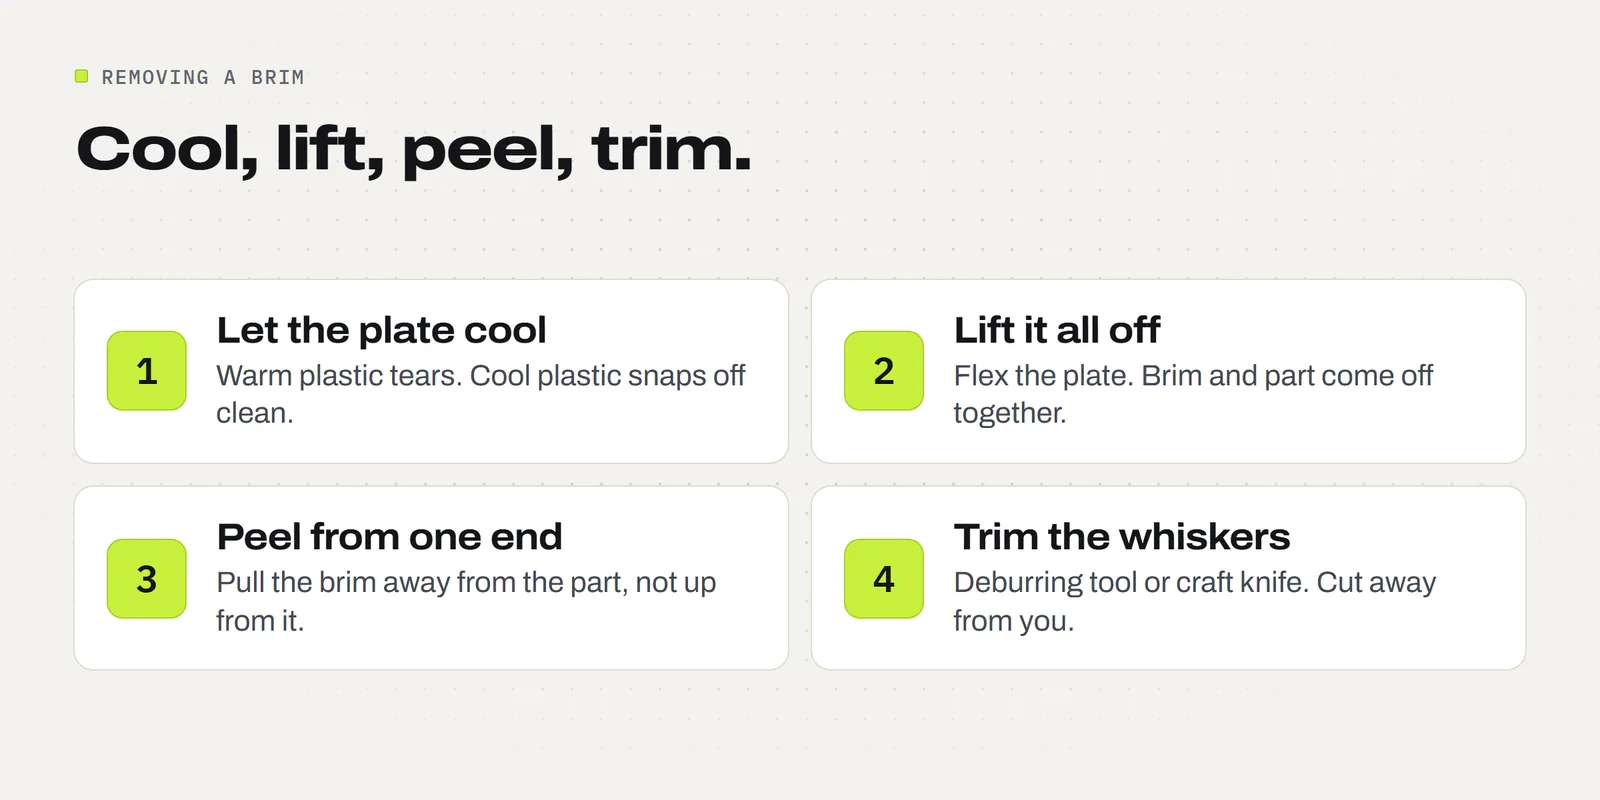
A brim with a small gap should come off in one go. A few habits make it cleaner:
- Let the plate cool. Plastic is softer and stretchier when warm, so a warm brim tears instead of snapping.
- Take the print off the plate first, with the brim still attached. Flex the plate gently and lift the whole thing together.
- Peel from one end, pulling the brim away from the part, not up from the part. On thin or delicate pieces, hold the part close to where you are peeling.
- Trim the leftovers. A deburring tool (a small swivel blade made for 3D prints) or a craft knife removes any thin whiskers along the bottom edge. Always cut away from your fingers.
If a brim fuses to the part and will not let go, the gap is too small or zero. Raise the brim-object gap a little, to 0.1 to 0.15 mm, and reprint. If you sell your prints, a clean bottom edge is worth the extra minute: people pick things up and look underneath.
Does a brim waste filament or time?
Very little. A brim is a single layer, 0.2 mm thick in nearly all our projects (that is their first layer height), so it is a thin film next to the part itself. The time and filament estimates in our print notes already include it. Compare that with losing a five-hour print at hour three because a corner let go. On the parts that need one, a brim is the cheapest insurance in 3D printing.
If the slicer preview shows a thin gap between the brim and the part, that is normal. It comes from a setting that keeps the bottom edge from flaring, explained in our guide to elephant foot.
Where a brim does cost something is cleanup time on parts that never needed it. That is why we save a brim only where the part calls for one. If you print to sell, those minutes add up over a batch of fifty, which is worth knowing when you price your prints.
Will a brim stop warping?
It helps a lot, but it is one fix among several. Warping comes from plastic shrinking as it cools, so a brim holds the corners down while the rest of the part settles. It works best together with a clean plate, the right bed temperature for the material, and no drafts across the printer. PLA warps far less than PETG or ABS; our PLA vs PETG guide covers the difference.
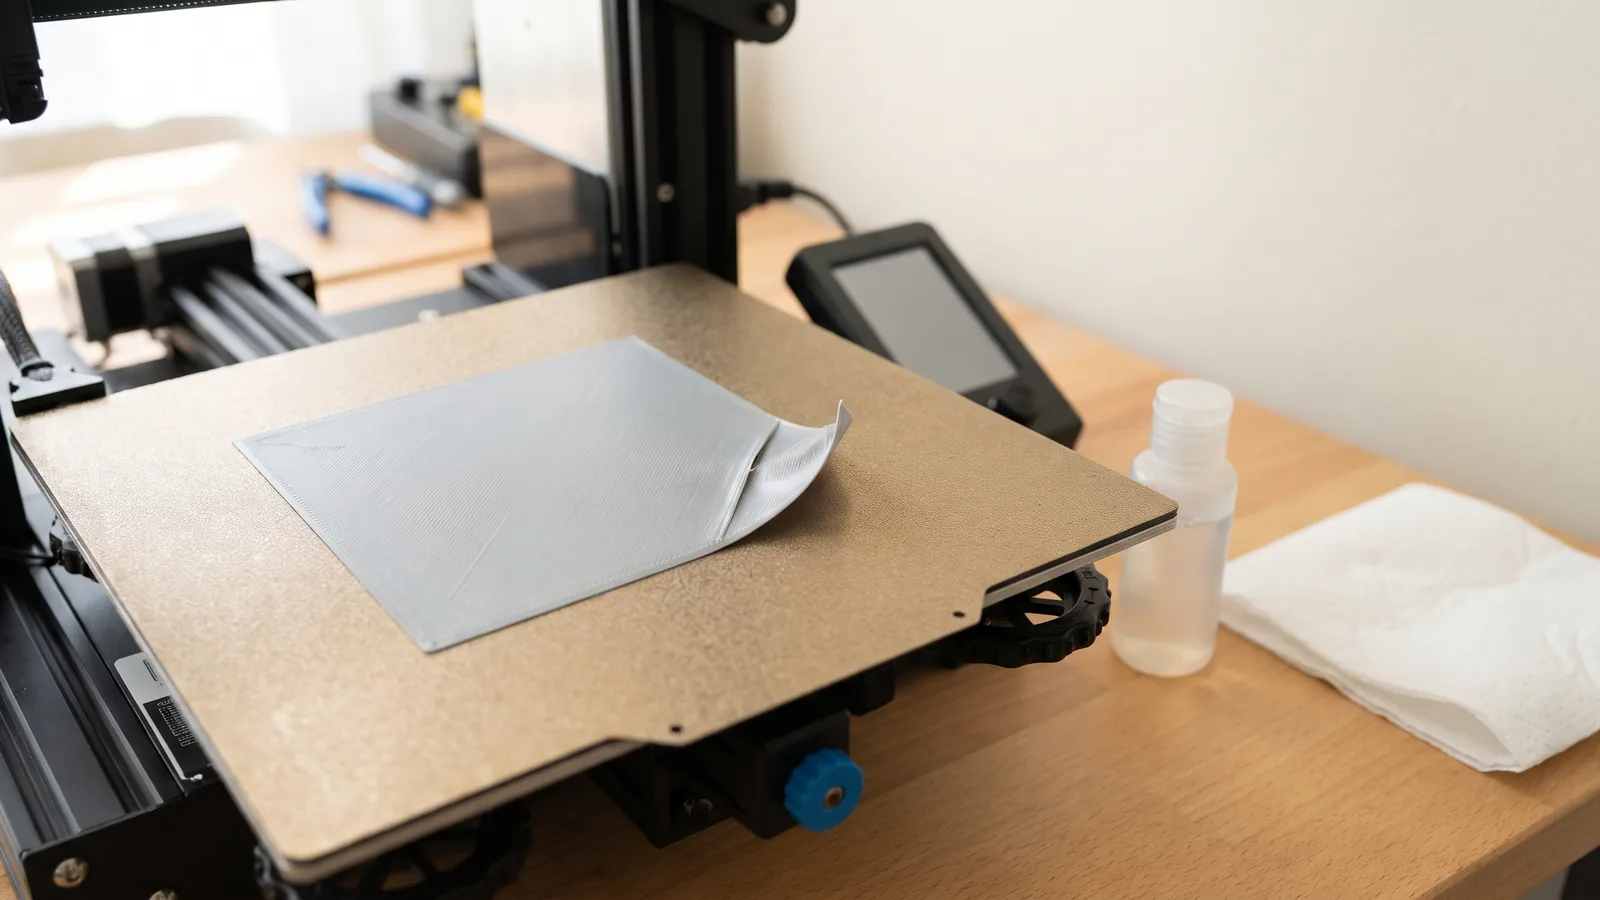
If a print still lifts with a brim on, the brim is usually lifting too. That points back to the plate: wash it with dish soap and warm water, dry it, and handle it by the edges. For the full list of fixes, in the order to try them, see our guide to 3D print warping.
The short version
A brim is a one-layer ring that helps a part grip the plate. Use one for tall, thin, tippy or long flat parts, skip it for parts with a good wide footprint, and peel it off once the plate has cooled. In our 3MF projects the brim is already saved where a part needs it, at the width we tested, so the only thing you have to remember is to leave it on. Each design also comes with STL files for other slicers and a license to sell the prints you make.
Designs from this guide
 $2.49
3ML-056 · Spinning tops
Spinning Tops Set
Five chunky finger-spun tops, from a classic onion top to a flip top that turns over and a little Christmas tree. STL + 3MF · 32 MB View model $2.49
3ML-061 · Spinning tops
Christmas Spinning Tops
Four Christmas finger tops: a tree with a star, a snowman, a snowflake disc and an ornament that flips over onto its cap. STL + 3MF · 11 MB View model $3.79
3ML-104 · Elf furniture
Elf Furniture Set
A little bedroom for your Christmas elf: a bed with a star headboard and bedding that lifts out, a red armchair with a white cushion, and a round side table. STL + 3MF · 12 MB View model $3.79
3ML-025 · Tealight houses
Village Tealight Houses
Four snowy little village houses that glow: a red cottage, an ivory church, a green shop and a gingerbread house, each with a lift-off snow roof over a battery LED tealight. STL + 3MF · 14 MB View model $3.79
3ML-070 · Monitor riser
Monitor Stand
A softly rounded desk riser that lifts your monitor 10 cm, with room to slide a keyboard underneath and a notch at the back for the cables. It goes together by hand: no screws, glue or tools. STL + 3MF · 260 KB View model $3.79
3ML-118 · Flexi penguin
Christmas Flexi Penguin
A chubby penguin sliding on its belly in a Santa hat and a knit scarf. The head turns and the body wiggles, and it prints in one piece, already joined. STL + 3MF · 5.7 MB View modelQuestions
What is a brim in 3D printing?
A brim is a flat ring of plastic, one layer thick, printed around the base of a part and joined to its edge. It widens the footprint so the part grips the build plate better. You peel it off once the print is done.
What is the difference between a brim and a skirt?
A skirt is a loop printed around the part with a gap, so it never touches it; it only primes the nozzle. A brim is joined to the part's edge and adds grip. Only the brim helps a print stay stuck.
Brim or raft: which should I use?
On a modern printer with a heated, level plate, use a brim. A raft is a thick mat under the whole part, which leaves a rougher bottom face and takes longer. None of our 454 project files use a raft.
Do I need a brim for PLA?
Usually not. PLA warps little, and a part with a wide flat base sticks fine on a clean plate. Use a brim for tall, thin, tippy or long flat PLA parts. 76 of our 454 projects, all PLA, use one.
How wide should a brim be?
Start at 3 mm, which is what half of our brims use. Go to 5 to 8 mm for tall parts on a small footprint, such as spinning tops or tall shells. A wider brim gives more grip but more to trim.
What is brim-object gap?
It is the small space between the brim and the part, so the brim snaps off cleanly. Most of our projects use 0.1 mm. If a brim fuses to the part, raise it slightly; if the brim falls away from the part, lower it.
What are brim ears or mouse ears?
Small round brim pads placed only at the corners of a part instead of a full ring. They pin down sharp corners, where warping starts, with less to peel off. In Bambu Studio set the brim type to Painted to use them.
How do you remove a brim cleanly?
Let the plate cool, lift the print off with the brim attached, then peel the brim away from the part starting at one end. Trim any thin whiskers with a deburring tool or craft knife, cutting away from your fingers.
Sources
Filed under Printing and slicing