Elephant Foot in 3D Printing: Why the Bottom Flares and How to Fix It
Elephant foot is the small lip around the bottom of a print where the first layer spreads wider than the rest. Here is why it happens, when you can ignore it, how to fix it, and the setting saved in 601 of our own project files.
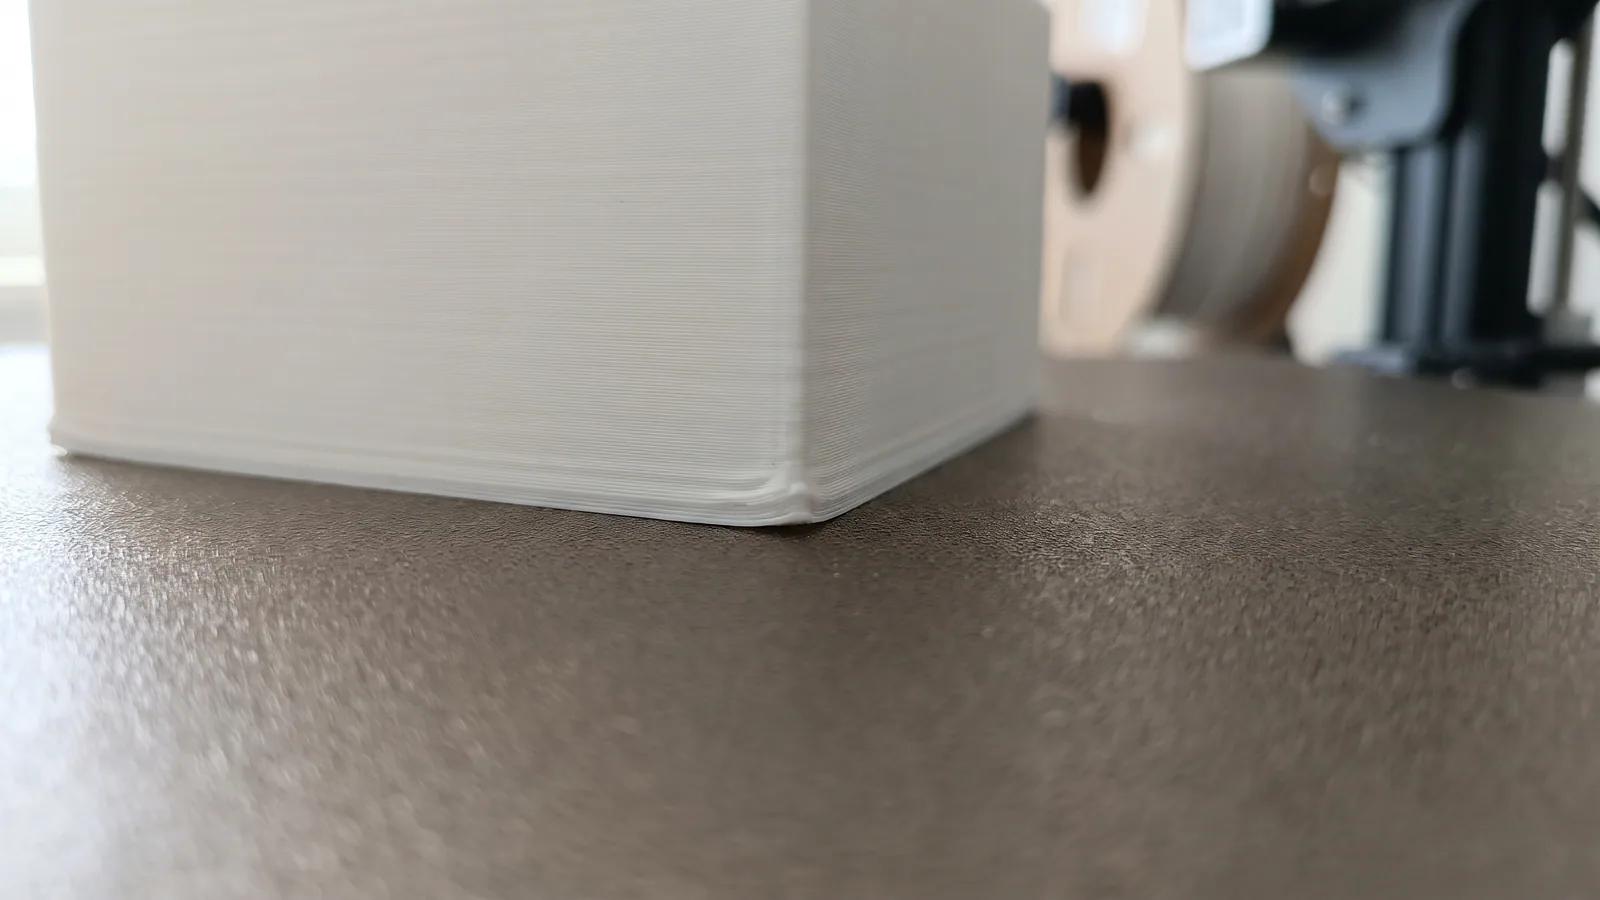
Turn a print over and run a fingernail around the bottom edge. If it catches on a thin lip that sticks out past the wall above it, that lip has a name: elephant foot. It is one of the most common flaws in home 3D printing, and on most prints nobody will ever notice it.
It matters when parts have to fit: a lid on a box, a peg in a hole, a drawer in a slot. This guide covers why the bottom flares, when you can ignore it, and the fixes in the order worth trying. It also shows what we do about it in the project files behind our ready-to-print designs. On 18 November 2026 we read the setting in 601 of them, and 577 use the same number.
What is elephant foot in 3D printing?
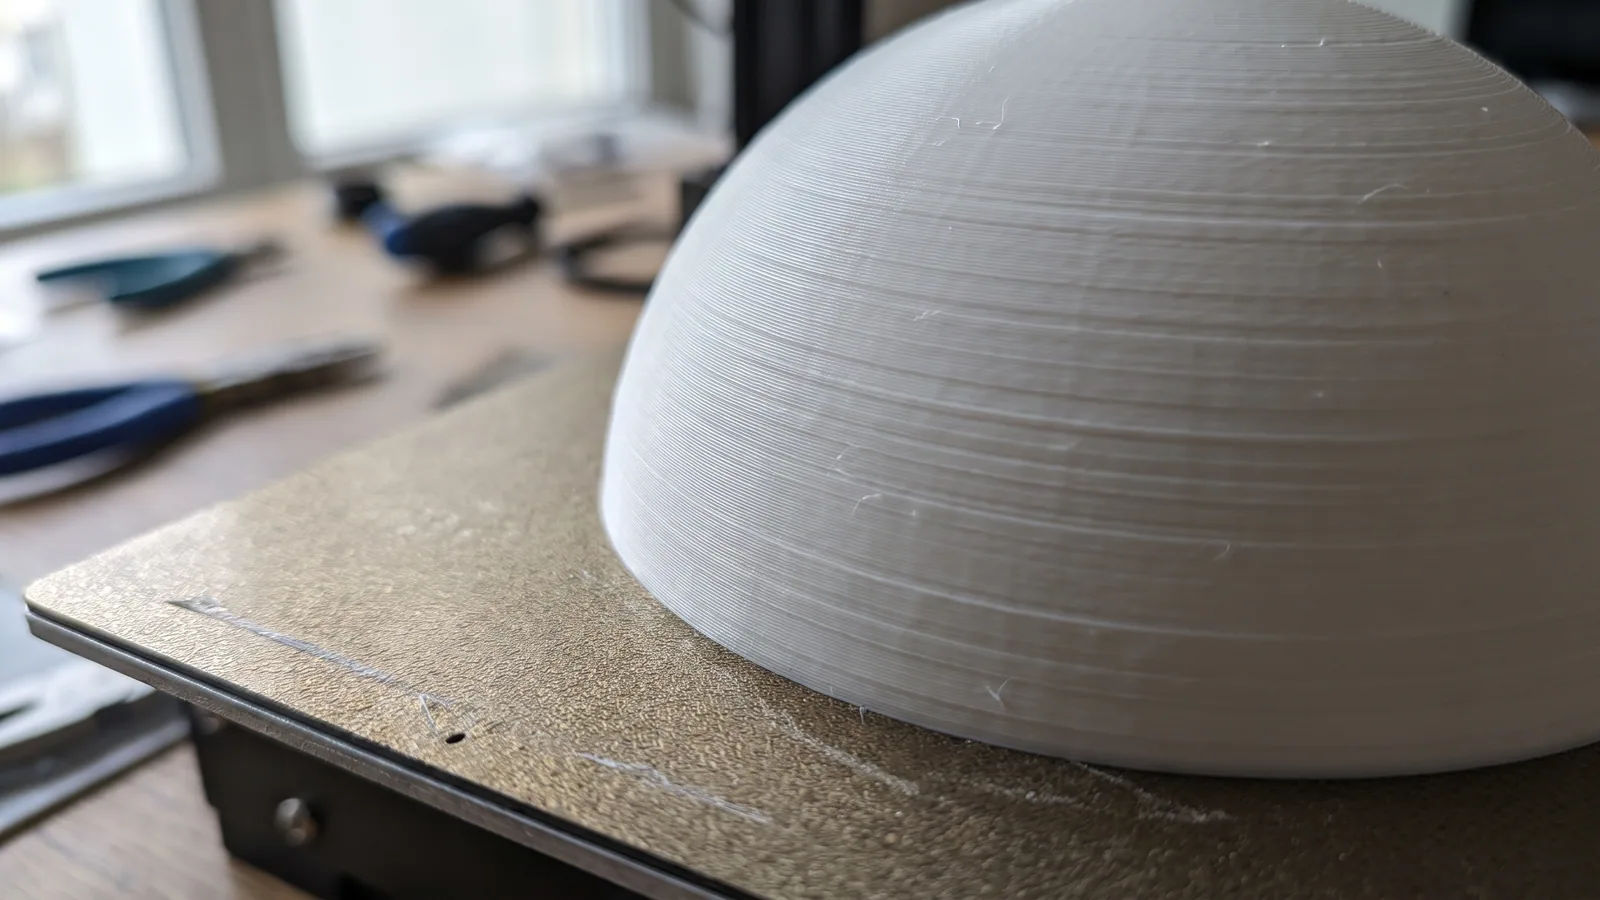
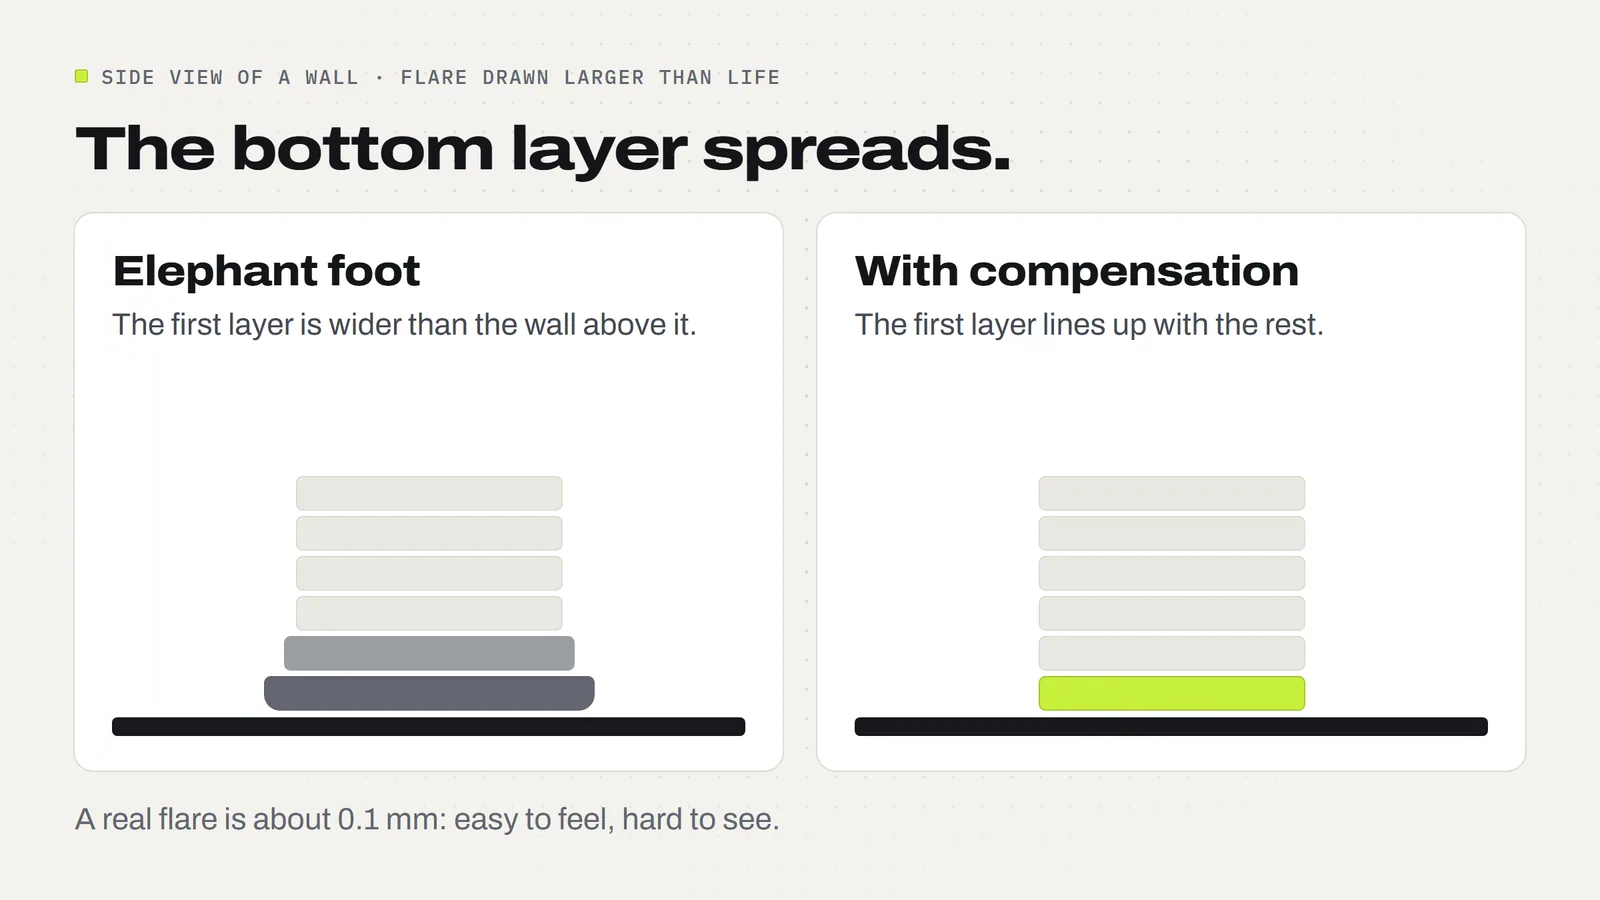
Elephant foot is a flare at the very bottom of a print. The first layer, and sometimes the next few, come out wider than the layers above. The result is a small rim around the base, like the foot of an elephant spreading under its leg.
Bambu Lab's wiki describes it as a first-layer flare where the bottom of the model is wider than the layers above it. The flare is small. In the wiki's own measured example a 25 mm test block came out about 0.1 mm wider at the bottom than at the top. That is roughly the thickness of a sheet of paper, spread over both sides.
You can feel that long before you can see it. On a vase or an ornament it changes nothing. On two parts that slide together it can be the whole difference between "fits" and "doesn't".
What causes elephant foot?
Two things act on the first layer at once, and Bambu Lab's wiki names both.
- Heat from the bed. The first layer sits on a heated plate, so it stays warm and soft much longer than the layers higher up.
- Weight from above. Every new layer presses down on that soft base. The wiki notes that larger models and wider bases usually show a more noticeable flare.
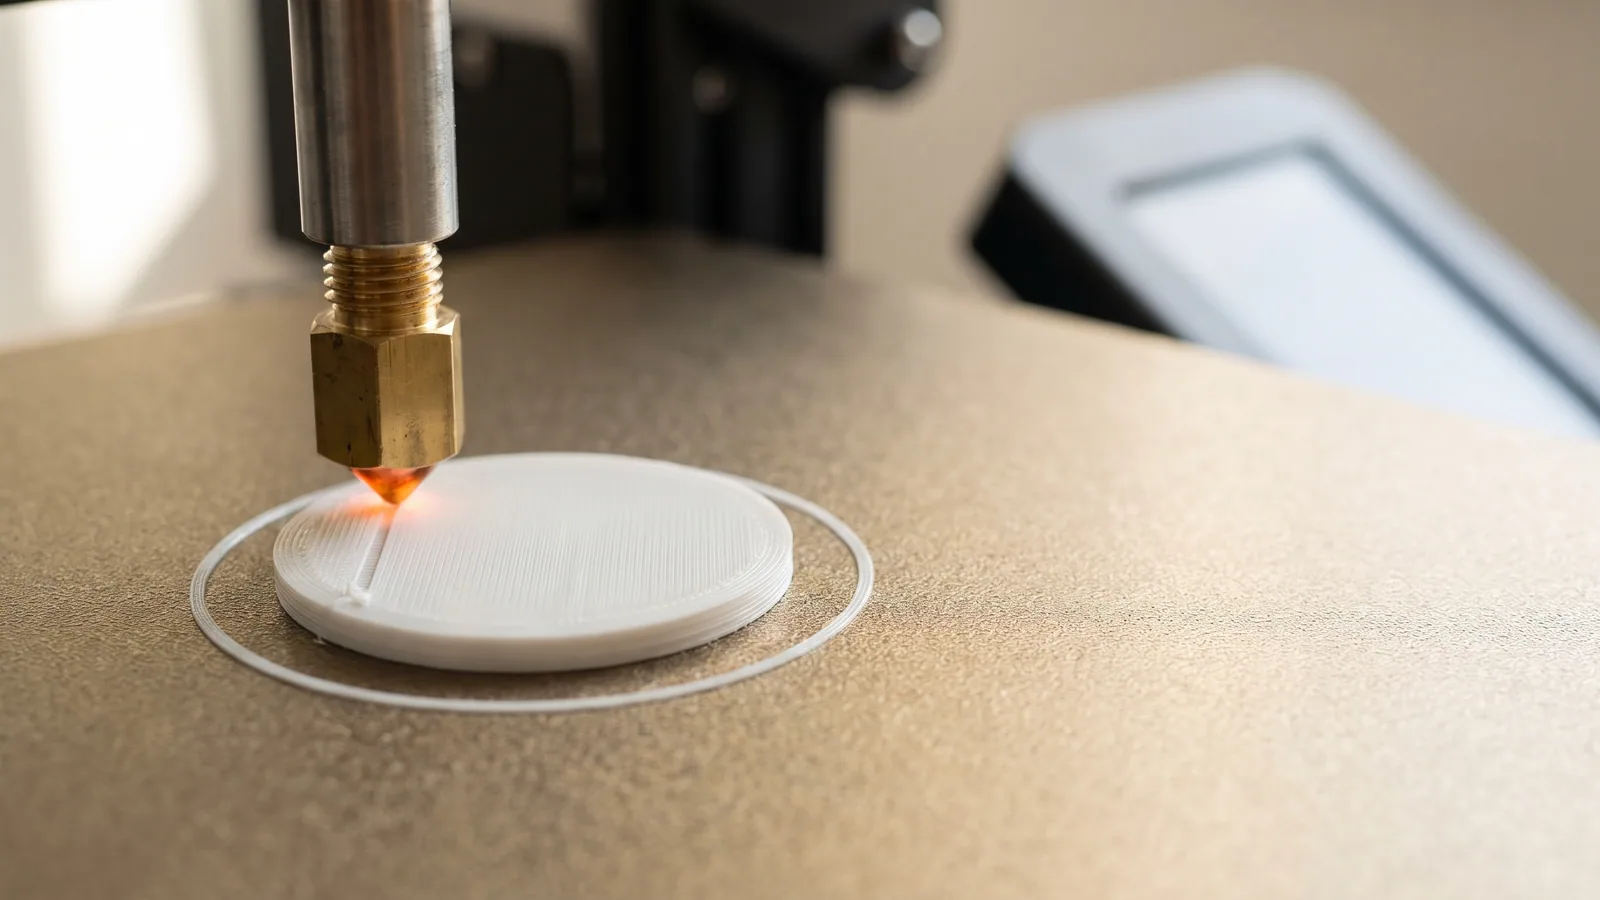
There is a third ingredient that is there on purpose. The printer presses the first layer firmly onto the plate so the print stays put. Prusa's guide puts it plainly: the first layer is squished against the heated bed, so it is usually a bit wider than it should be. That squish is what makes a print stick, so a little elephant foot is the price of good grip.
This is why "just stop squishing" is the wrong fix. Raise the nozzle or cool the plate too far and you trade a harmless lip for a print that lets go halfway through. If that has happened to you, our guide to prints that won't stick to the bed covers the other side of this balance.
Does elephant foot matter?
Often it doesn't. Bambu Lab's wiki says a slight elephant foot can be ignored on most parts printed for looks. It matters on parts that depend on size, and the wiki lists them: assemblies, snaps, rails and shaft holes.
A quick way to decide:
- Ignore it on decor, ornaments, figures, planters and anything that stands alone. A light pass with a fingernail or a deburring tool tidies the edge if a buyer will handle it.
- Fix it when the bottom face of one part has to meet another: lids, drawers, stacking pieces, pegs and holes that start on the plate, puzzle pieces, anything that clicks together.
- Watch holes most of all. A flare on the outside of a part makes it wider. The same flare around a hole on the bottom face makes the hole smaller, so a pin that fits at the top jams at the bottom.
If you print to sell, check the parts a customer will push together with their own hands. A drawer that sticks reads as a faulty product, even when the cause is a tenth of a millimeter.
How do you fix elephant foot?
Start with the slicer, the app that turns a model into printer instructions. It has a setting made for exactly this, and it costs nothing to use. The other fixes are for when that setting isn't enough.
| Fix | What it does | Use it when |
|---|---|---|
| Elephant foot compensation | The slicer draws the first layer slightly smaller, so the squish brings it back to size | First, every time. It is the standard fix. |
| Let the plate cool before removing the print | The base hardens before you pull on it | Always. Bambu's wiki warns that forcing a part off a hot plate can deform it. |
| Calibrate the filament | Stops the printer pushing out more plastic than the first layer has room for | The flare is large, or the first layer looks overfilled and rough |
| Lower the bed temperature a little | The base stays firmer under the weight above | Tall, heavy prints still flare after compensation. Go in small steps and watch that prints still stick. |
| A small bevel on the bottom edge of the model | The design itself leaves room for the squish | You are designing the part, or the file's designer has already done it |
| Trim or sand the lip | Removes the flare after printing | One-off prints. Too slow for a batch. |
Notice what is not on the list: a raft. Printing on a raft does move the first layer off the plate, but it costs time and plastic and leaves a rougher underside. For a lip this small, the slicer setting is the better tool.
What is elephant foot compensation?
It is a slicer setting that shrinks the outline of the first layer by a set amount. The printer then squishes that slightly-too-small layer onto the plate, it spreads, and it ends up the size it was meant to be. Bambu Lab's wiki describes it the same way: the slicer intentionally shrinks the first-layer outline so the printed first layer lines up with the layers above.
The number is small. In Bambu Lab's worked example the right value came out at 0.10 mm, and the wiki's before-and-after pictures use 0.2 mm. Prusa's guide says values around 0.2 mm usually work well for a standard 0.4 mm nozzle, and that Prusa's own profiles have the setting turned on by default.
In Bambu Studio you will find it here:
- On the Prepare screen, open the Process section on the left.
- Go to the Quality tab and find the Precision group.
- Elephant foot compensation is in that group. Type a value in millimeters.
- Slice the plate again before you print.
In PrusaSlicer it is under Print settings, then Advanced, and you need Advanced or Expert mode to see it. Bambu's wiki adds that for ordinary models that don't need high accuracy, the value already in the profile is fine. Most people never need to touch it.
How do you find the right compensation value?
You measure it. Bambu Lab's wiki gives a method that takes one short print and a digital caliper (a sliding measuring tool; a basic one that reads to 0.01 mm is enough).
- Clean the plate and run the printer's bed leveling and flow calibration, so you are measuring the flare and nothing else.
- Print a small block. The wiki uses Bambu Studio's built-in cube resized to 25 × 25 × 10 mm. Set elephant foot compensation to 0 and turn the brim off for this print.
- Wait until the plate is fully cool before taking the block off.
- Measure the top across the middle of each side, in both directions. Skip the corners.
- Measure the bottom the same way, letting the caliper only lightly touch the lip. Squeeze and you flatten the thing you are trying to measure.
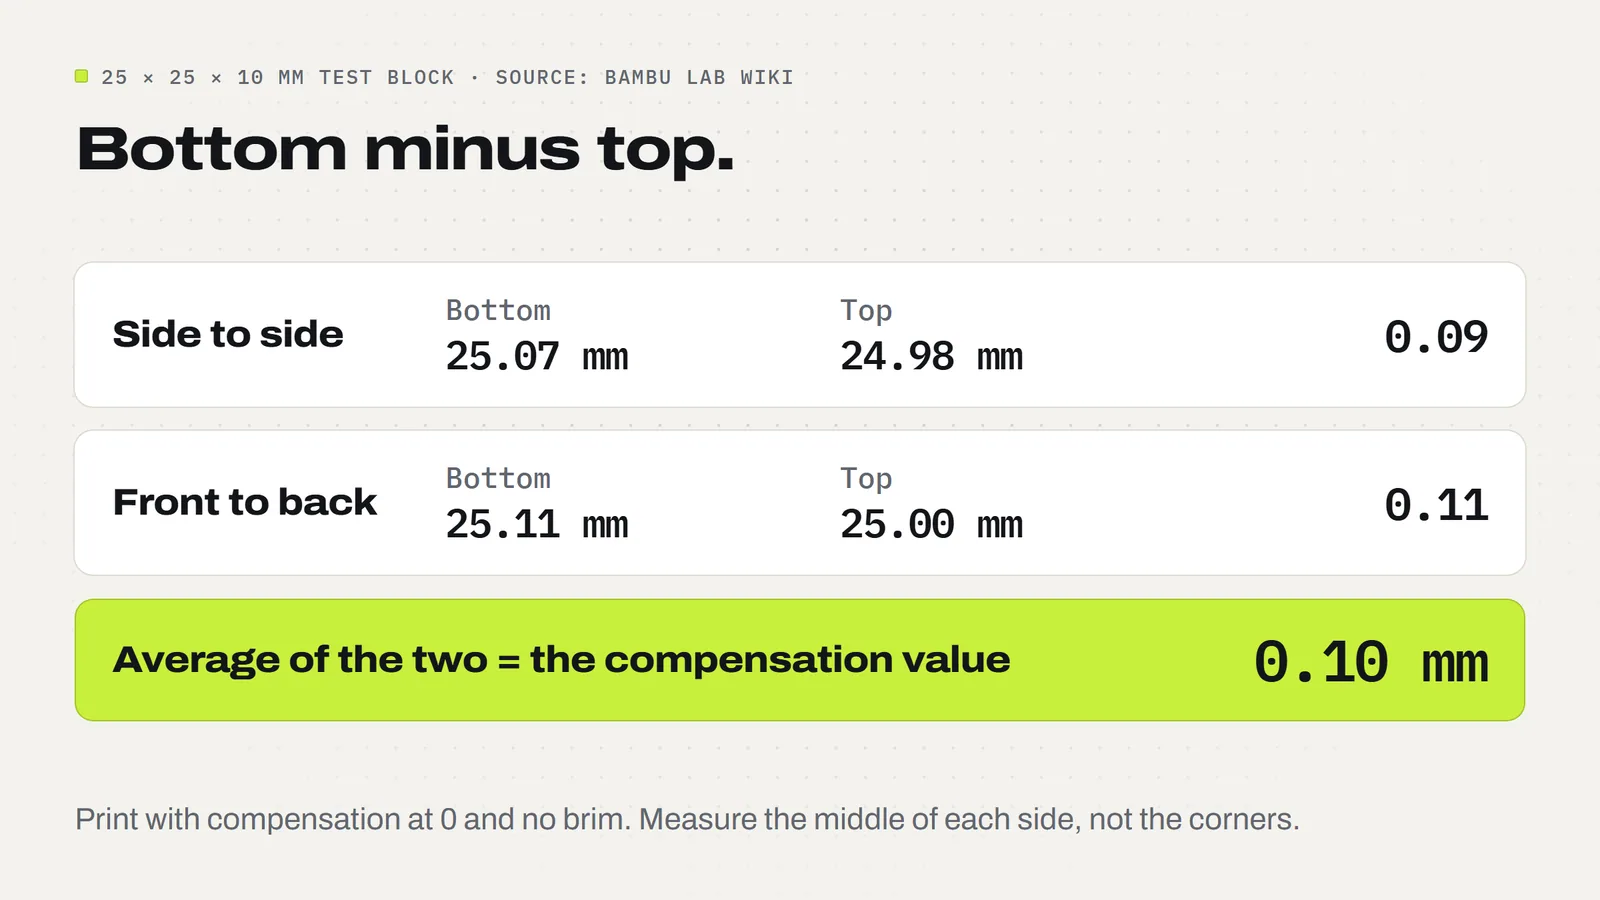
- Subtract. Bottom minus top, in each direction. Average the two results. That is your value.
The wiki's example: the block measured 25.07 mm at the bottom and 24.98 mm at the top one way, a difference of 0.09. The other way it was 25.11 against 25.00, a difference of 0.11. The average is 0.10 mm, so 0.10 goes in the box.
One warning from the same page: the value is different for different build plates. A number measured on a textured plate does not carry over to a smooth one, so measure again if you switch. Our guide to the textured PEI plate explains how the two surfaces differ.
What do real project files use?
Every design we sell comes as a 3MF project, a file that carries the print settings along with the shape (what a 3MF file is). So we can count what we use. On 18 November 2026 we read the elephant foot compensation saved in 601 project files across 142 design folders, including a few older versions we keep on file:
- 0.15 mm in 577 files. That is 96 of every 100.
- 0.10 mm in 13 files, all of them the Christmas Cookie Cutters.
- 0 in 11 files, all of them the Build Bag kit.
All 601 are saved for a textured PEI plate, and 515 of them print with no brim at all.
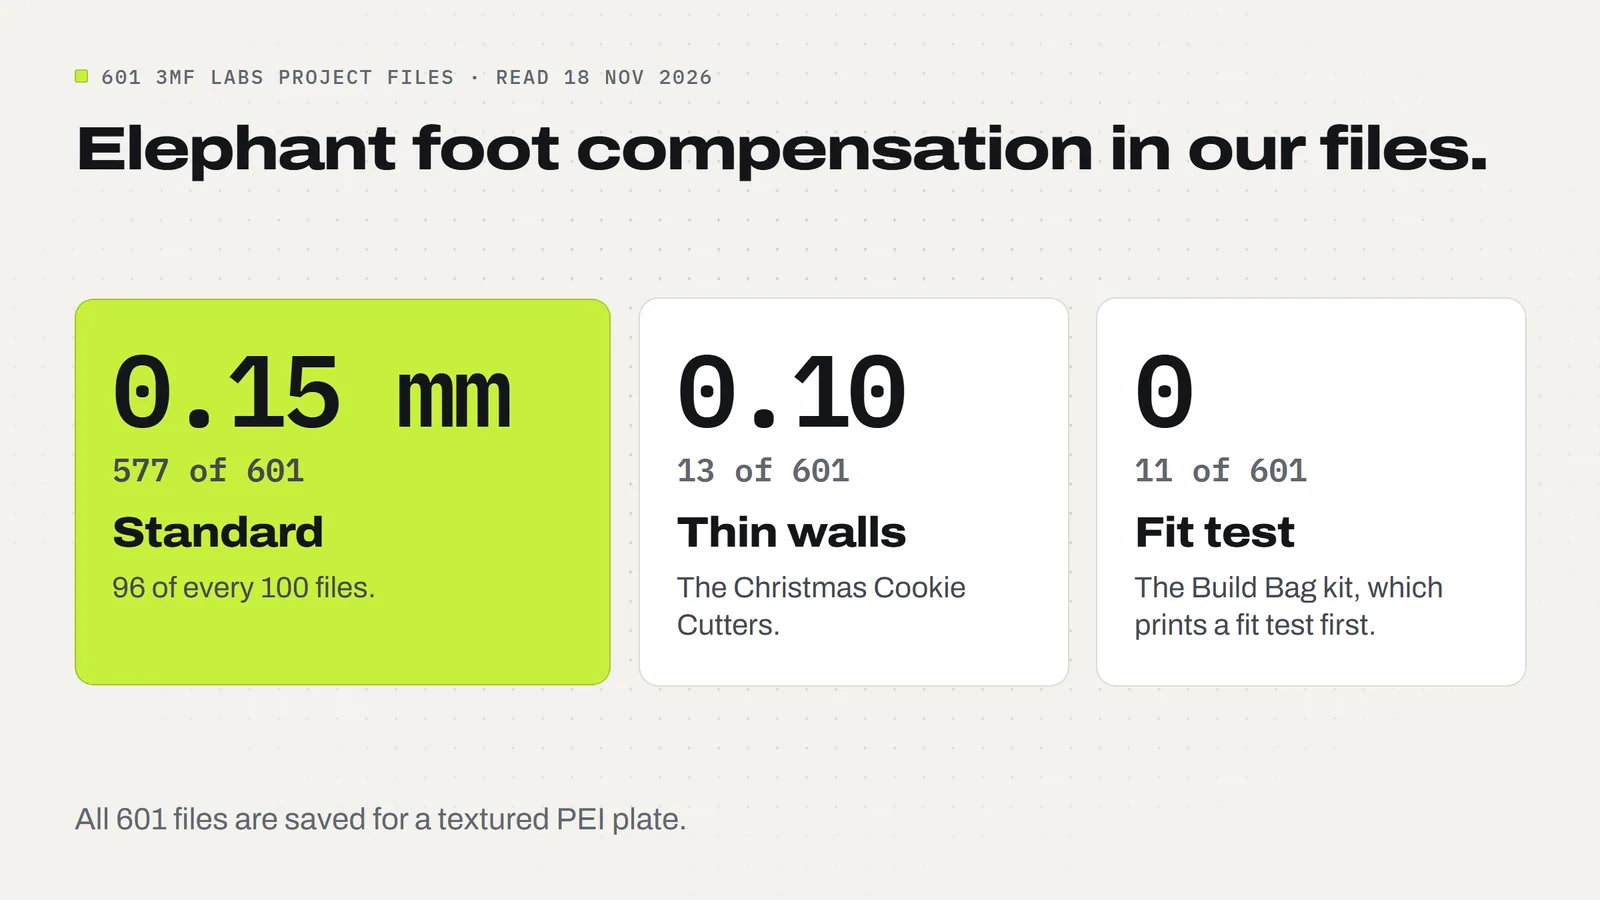
The two exceptions are the interesting part. The cookie cutters have walls only two lines of plastic wide, the kind of thin feature where shrinking the outline needs care, and their files use a smaller value. The Build Bag is a kit of 103 beams, gears, pins and axles that all have to push together. Its files are saved at 0, and it handles fit a different way: a 28-minute Fit Test prints first, and the download includes tight and loose versions of the pins in case your printer runs small or large.
That is the practical lesson. A compensation number is a good general answer, and a short test print is a better one. Designs with joints that matter should come with a test piece, so you find out in minutes and not after a five-hour plate.
Can you set elephant foot compensation too high?
Yes. Go too far and the first layer ends up smaller than the layers above it. The bottom edge gets a small step inward, like a shadow line around the base, and holes on the bottom face come out too loose.
Thin features suffer first. A wall that is only two lines of plastic wide has little outline to give away. Prusa's guide notes that PrusaSlicer detects thin lines in the first layer and avoids shrinking them too much, which is a sign of how easily it can go wrong.
So change it in small steps. If the default leaves a lip, go up by 0.05 mm and print the test block again. If you see the bottom edge stepping inward, come back down.
Why is there a gap between the brim and the model?
A brim is a flat ring printed around the base of a model to help it stay on the plate. With elephant foot compensation on, the slicer's preview can show a thin gap between that ring and the model, and people often take it for a mistake.
It is expected. Bambu Lab's wiki explains that compensation shrinks the first layer, and the preview does not show the squish that happens in a real print. On the printer, that gap is usually filled by the plastic as it spreads. Prusa's guide says the same gap is on purpose. You can leave it alone.
A short elephant foot checklist
- Decide if it matters. On decor and stand-alone pieces, it usually doesn't.
- Check that elephant foot compensation is on in your slicer. Leave the profile's value unless parts don't fit.
- Let the plate cool fully before removing prints.
- If parts still bind, print a 25 × 25 × 10 mm block with compensation at 0, measure top and bottom, and use the difference.
- Change the value in steps of 0.05 mm, and measure again if you change build plates.
- If a design comes with a fit test, print that first.
If the lip comes with corners lifting off the plate, that is a different problem; see warping. And if you are still learning the app, Bambu Studio for beginners walks through opening a project and printing it.
Or skip the tuning: every design in our catalog opens with its first-layer settings, plate and layout already saved, with STL files included for other slicers. The license lets you sell the physical prints you make, with no limit and no royalty; the details are on the license page. Questions about what comes in a download are answered in the FAQ.
Designs from this guide
 $8.99
3ML-081 · Engineering kit
Build Bag
A printable engineering kit for kids: 103 beams, gears, wheels, axles, pins and bolts that all fit one 15 mm grid. Print the bag once, then build a crane, a racer, a catapult, a grabber, a speed spinner and a bridge, step by step. STL + 3MF · 22 MB View model $3.79
3ML-033 · Cookie cutters
Christmas Cookie Cutters
Four Christmas cookie cutters, each with a matching stamp that presses in the details: gingerbread man, Christmas tree, snowflake and mitten. STL + 3MF · 2.5 MB View model $5.99
3ML-134 · Snap-together toy truck
Monster Truck
A big snap-together monster truck with a square pickup body, a roll cage and race seat inside, and four huge tyres that turn. 20 pieces, no glue, no screws, no AMS. STL + 3MF · 9.1 MB View model $5.99
3ML-024 · Advent calendar
Advent Calendar
A Christmas tree advent calendar with 24 pull-out drawers numbered 1 to 24 in gold, red and ivory like a checkerboard, a gold star on top and a stand it snaps into. STL + 3MF · 9.2 MB View model $2.49
3ML-083 · Bag clips
Bag Clips
Snack bag clips in three sizes that print in one go with the hinge already inside: fold them shut once and they snap closed. STL + 3MF · 1.2 MB View modelQuestions
What is elephant foot in 3D printing?
It is a flare at the bottom of a print. The first layer, and sometimes the next few, come out wider than the layers above, leaving a small lip around the base. In Bambu Lab's measured example the bottom of a 25 mm block was about 0.1 mm wider than the top.
What causes elephant foot?
The first layer is pressed onto a heated plate so the print sticks. It stays warm and soft, and the weight of the layers above pushes it outward. Bambu Lab's wiki names bed heat and the weight of upper layers as the two causes, and says larger models with wider bases show it more.
How do I fix elephant foot?
Turn on elephant foot compensation in your slicer. It draws the first layer slightly smaller so the squish brings it back to size. Also let the plate cool fully before removing the print. If parts still don't fit, print a small test block, measure top and bottom, and use the difference as the value.
What is a good elephant foot compensation value?
Between 0.1 and 0.2 mm for a standard 0.4 mm nozzle. Prusa says values around 0.2 mm usually work well, and Bambu Lab's worked example arrives at 0.10 mm. Of our 601 project files, 577 are saved at 0.15 mm. The right number depends on your printer and build plate.
Where is elephant foot compensation in Bambu Studio?
In the Process section, open the Quality tab and look in the Precision group. Type a value in millimeters and slice again. Bambu Lab's wiki says the value already in the profile is fine for ordinary models that don't need high accuracy.
Does elephant foot matter for prints I sell?
Only where parts meet. On ornaments, figures and decor nobody will notice it. On lids, drawers, pegs and anything that clicks together, a lip of a tenth of a millimeter can make a part stick, so test the fit before printing a batch.
Can elephant foot compensation be too high?
Yes. Too much and the first layer ends up smaller than the layers above, leaving a small step inward around the base and loose holes on the bottom face. Thin walls suffer first. Change the value in steps of 0.05 mm and reprint a test block.
Why is there a gap between the brim and my model?
Elephant foot compensation shrinks the first layer, and the slicer preview does not show the squish of a real print. Bambu Lab's wiki says the gap is normal and is usually filled by the plastic as it spreads. Prusa's guide says the same gap is on purpose.
Sources
Filed under Printing and slicing